
There are no words that are strong enough to describe our love for makeup brushes and beauty blender sponges <3! We always buy tons of them, and as beauty addicts, we still find a good excuse to buy new ones! After watching so many Youtube tutorials, how can you resist not to geek out and buy one more for your collection.
However, we often end up not taking good care of them. This isn’t just bad for your expensive brushes and sponges, but it can also be awful for your skin. The consequences can be – bacteria and developed infections on one side and ruined brushes and miracle sponges on the other. Fortunately for you, we are here to tell you why and how you should regularly wash your brushes and beauty blender sponges.
We have prepared a handy guide for you to learn:
- The difference between brushes (foundation, blush, highlighter)
- Why you need to clean your makeup brushes
- What happens to your skin and brushes when you don’t clean them regularly
- How often you should sanitize your bristles and sponges
- Best products you can use for cleaning
- How to wash your brushes step by step
- Storing your makeup tools
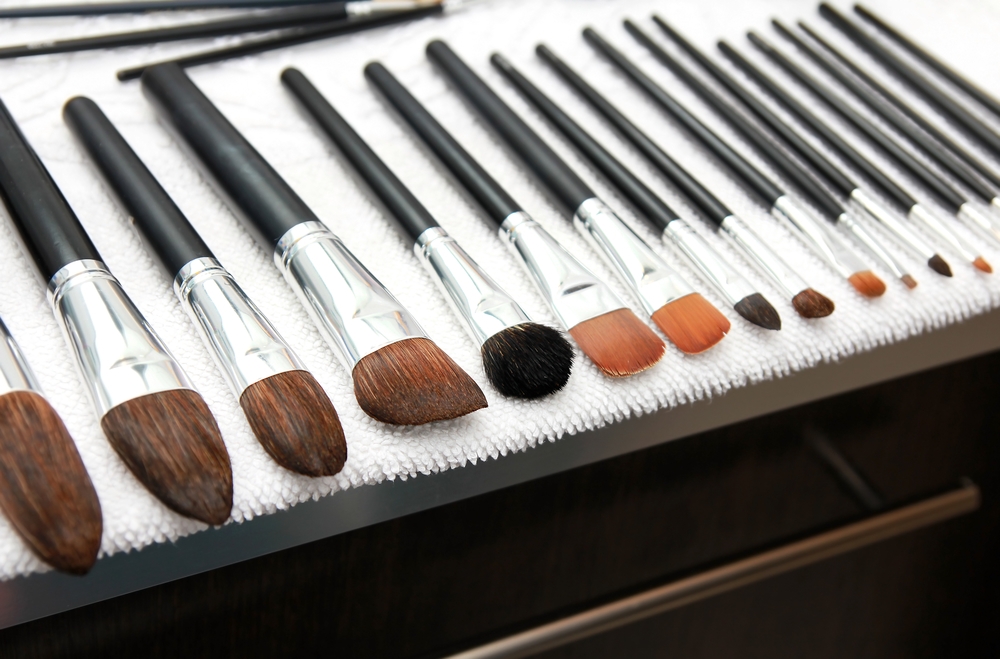
1. The Difference Between Makeup Brushes
Nowadays, you can find so many brushes on the market. But, even the makeup artists don’t use them all! Here are some of the most common and most used brushes that you need to have in your makeup collection.
First of all, the main difference is between synthetic and natural brushes.
Synthetic brushes are great for applying liquid and cream products since they are made of nylon and other polyester fibers. They don’t soak too much makeup, so they are great for precise application.
On the other hand, natural bristles are made of natural animal hair (horse, goat, and sable). They are better for powder makeup since they lift a lot of products.
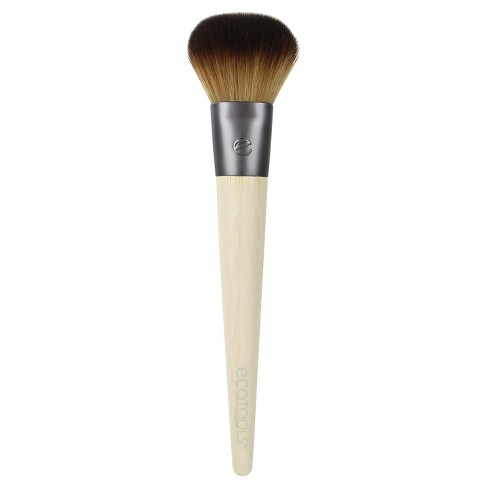
Must-have makeup brushes
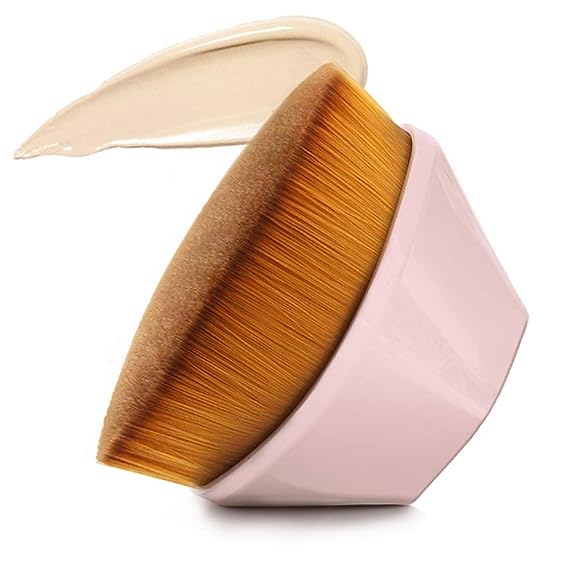
Foundation Brush: These will make your skin glow, and it is mostly used for liquid foundations, bases, and BB creams. There are so many different shapes on the market, but still the most common are flat, rounded brushes. You use it downward motion starting from the area where you need the most coverage.

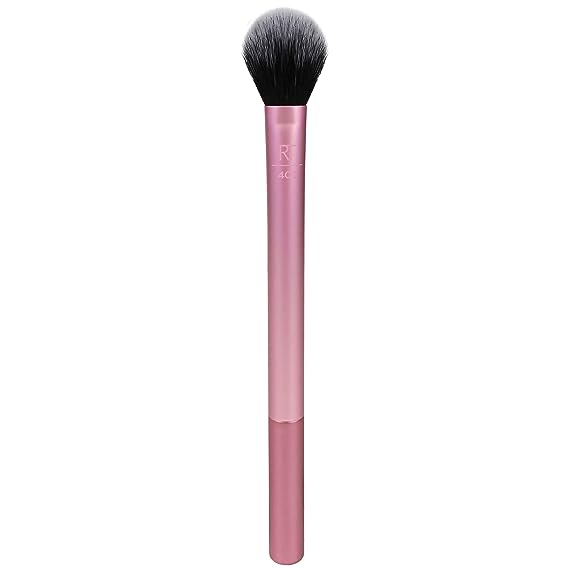
Blush Brush: with this brush, you can easily apply blush, as well as bronzer and powder highlighters. It has longer, loosely packed bristles, and it is soft and fluffy. It is designed to pick just the right amount of powder. Pick the size based on the size of your cheek and cheekbones.
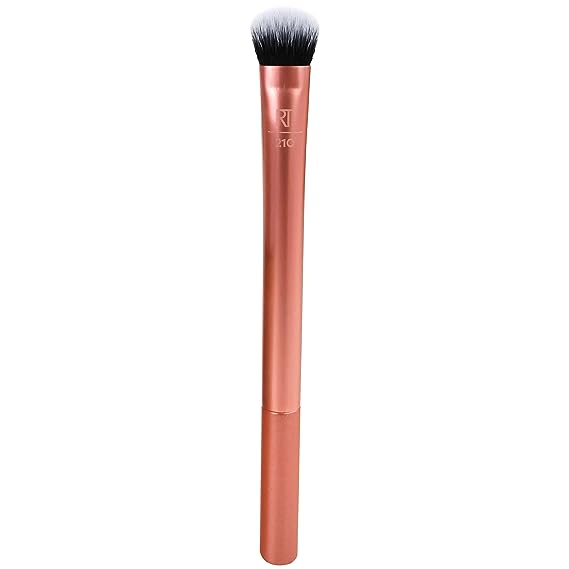
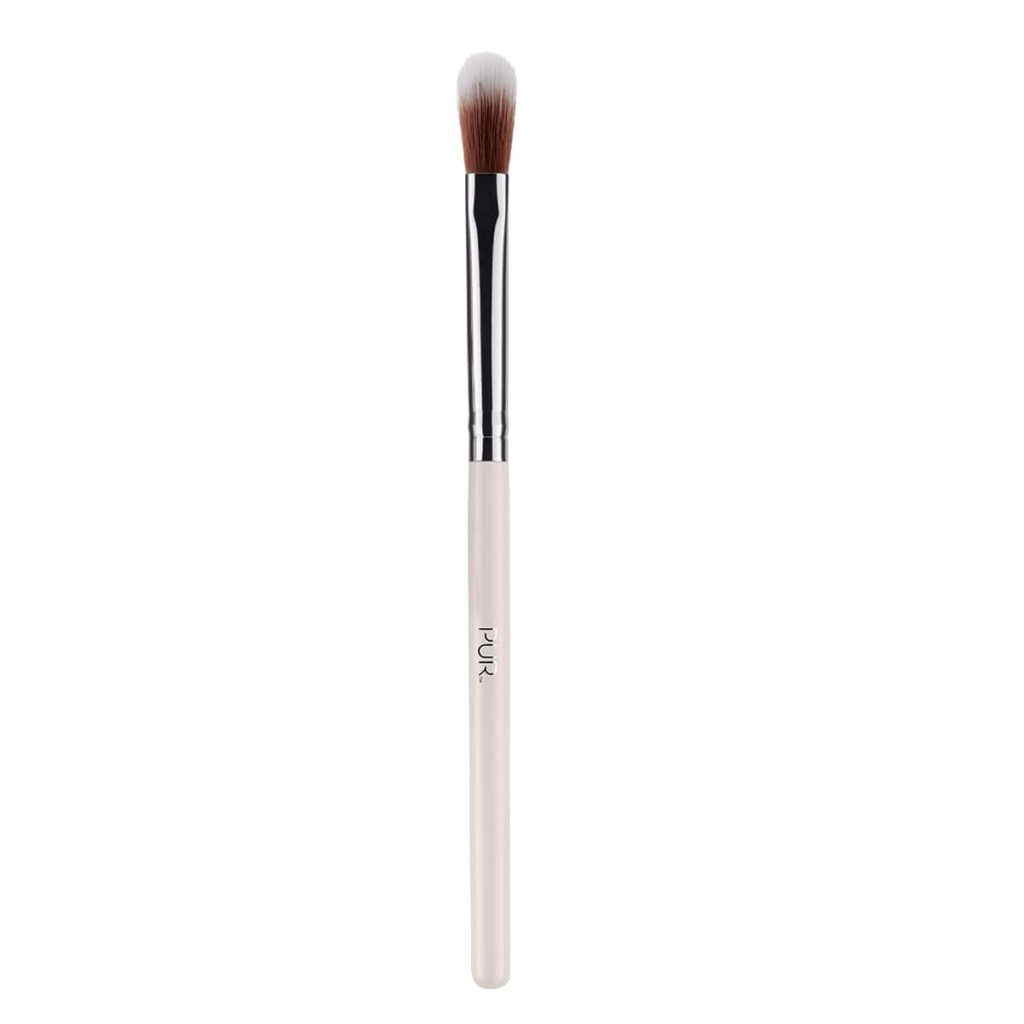
Concealer Brush: They have a flat, rounded tip great for blending concealer. Use it for applying and blending the concealer under the eyes, on your nose, and chin. You can also find pointy ones used for covering tiny blemishes or broken capillaries.
Related: How To Apply Concealer And How To Choose The Right One
Powder or Setting Brush: These have loosely packed bristles, they are fluffy and soft. Use this brush for the lovely finish, applying the powder, and setting the places on your face that can easily shine.
Contour Brush: since contouring your face became so popular, you can use this brush only for that purpose. It’s easier to master the technique if you have the right tool. Contour brushes are angled with densely packed bristles that allow more precise shading.
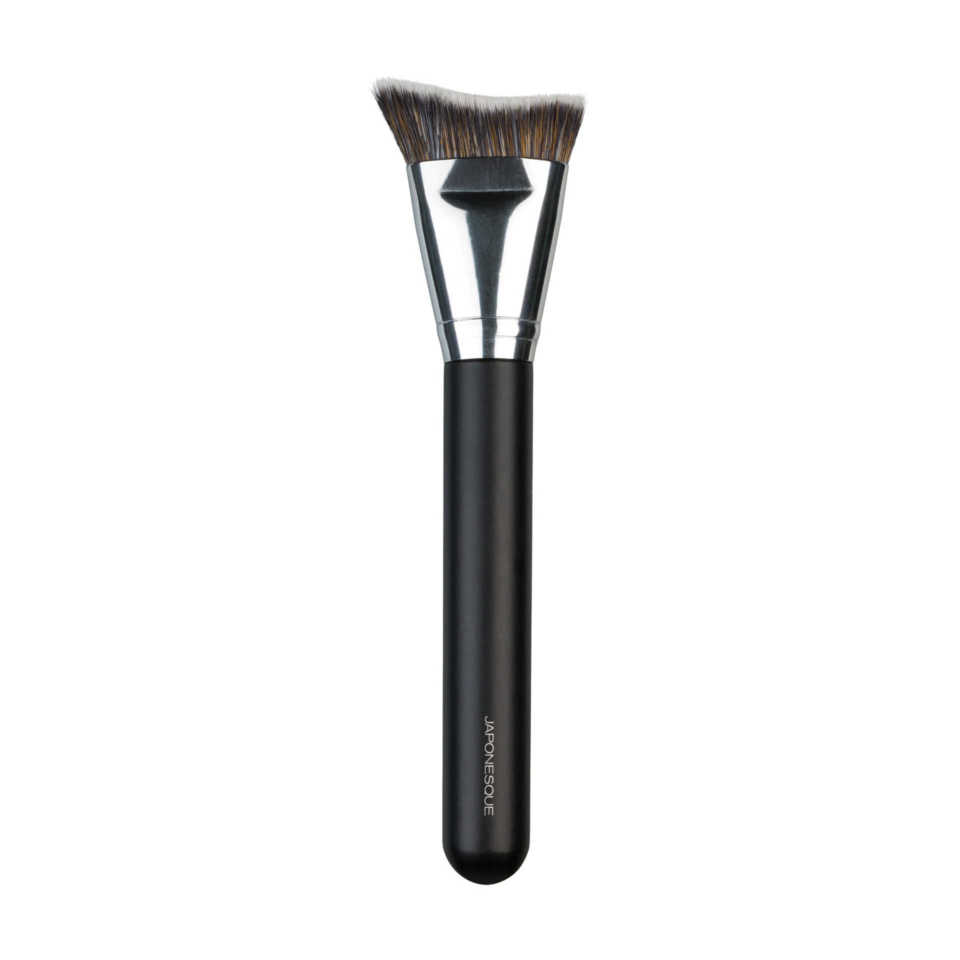
Kabuki Brush: Known for its flat top and densely packed bristles, this brush is great for applying liquid or cream products as well as powders.
Blending Brush: it blends the eyeshadows and removes the harsh lines between the two different shades. This brush is also perfect if you want a sheer wash of color over your eyelids.
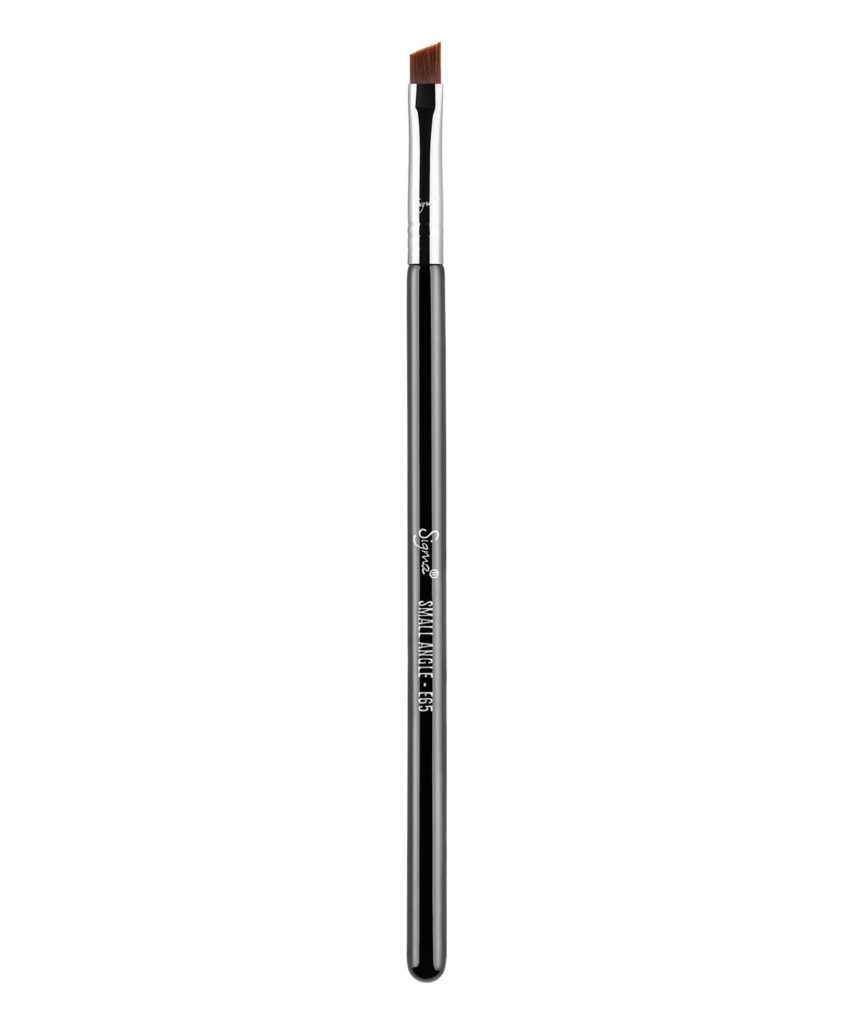
Angled Brush: used for filling in your eyebrows or applying cream eyeliner. Firm, short and dense bristles allow you to create clean and defined edges.
2. Why You Need To Clean Brushes and Sponges
Hygiene – Whenever you use your makeup brushes, they are collecting everything that is on your face — namely, oil, dead skin cells, dust, and anything else clinging to your skin. This is a recipe for disaster (or rather, acne). Every time you use a dirty brush, you are wiping this disgusting combination all over your face, clogging your pores as a result.
Bacteria and Viruses – Believe it or not, both viruses and bacteria live inside our brushes. When you powder your nose with a dirty brush, there is a big chance you can catch a cold! Bacteria, on the other hand, can cause some problems like conjunctivitis and staph infections. They live long in bristles, so be careful.
Longer lasting makeup products – Dirty brushes are also a breeding ground for bacteria. Not only is this terrible for your face, but it is also bad for your makeup products. Transferring all these bacteria to your products taints them, and what should have lasted you a year will be spoiled within months. Also, if you take better care of brushes, they will last for years!
Maintain soft brushes – Dirty brushes become more abrasive and dry as they become more caked with product and debris from your face. In turn, this irritates your skin. Regularly cleaning your brushes keeps them soft enough not to cause damage to your face. The more frequently you wash them, the longer your investment will last.
Better color application – Dirty brushes are also ineffective for applying color precisely. With old makeup caked on your brushes, you are unable to get the look you’re going for. Whether you are seeking for naturally blended contour or a dramatic eyeshadow.

3. What Happens to Your Face When You Don’t Wash Makeup Brushes
The rule of thumb for all makeup lovers is thoroughly cleaning your face before going to bed. No matter how tired you are, you need to take that mascara off your face.
The same rule should apply to your makeup brushes. When dirty brushes touch your face, it becomes a breeding ground for bacteria, acne, and many other (more serious) things like Staphylococcus aureus.
Let’s see what can happen to your face if you don’t want your brushes. Yes, our primary goal is to scare you, so you wash your brushes regularly from now on.
4 skin problems that are caused by dirty brushes
The appearance of acne. Sometimes, it doesn’t even matter if you take good care of your skin and wash it regularly. Dirty brushes give the bacteria a chance to create chaos on your skin. Acnes are the first sign that you are not taking good care of your brushes and sponges.
Skin irritation. Redness, as well as bumps, can occur on your skin if you don’t regularly wash bristles.
Premature skin aging. Even though there is no study to confirm it, dirt can cause collagen to break down, which leads to premature aging. With the right beauty products as well as clean brushes, you can prevent that happen.
Lifeless skin. Sebum from our pores is regularly transferred from brushes to our faces. However, when you don’t take good care of your makeup tools, this process becomes vice versa. Instead of glowy and beautiful skin, it becomes dull and so lifeless.

4. How Often Should You Wash Makeup Brushes
There is a big difference between the terms of washing and cleaning your makeup brushes. The cleaning should occur once or twice a week. However, the brushes that you use for eye makeup you should clean in-between uses.
When it comes to washing, it should be done once a month with soap and other products that you probably have in your bathroom or kitchen.
Makeup artist Bobbi Brown has this to say on the subject “For concealer and foundation brushes, at least once a week to prevent a buildup of product. And because these brushes are used on your face, the cleaner, the better. Brushes that are used around the eyes should be cleaned at least twice a month, while all others can be washed once a month.” However, that is advice for personal use. If you are a makeup artist, it goes without saying that you should wash and sanitize your brushes after every client. So if you have client after client, you should probably have prepared two or three sets of brushes.
5. Which Products to Use for Cleaning
From spray brush cleaners to the olive oil that comes straight from your kitchen – these things are great for cleaning your brushes.
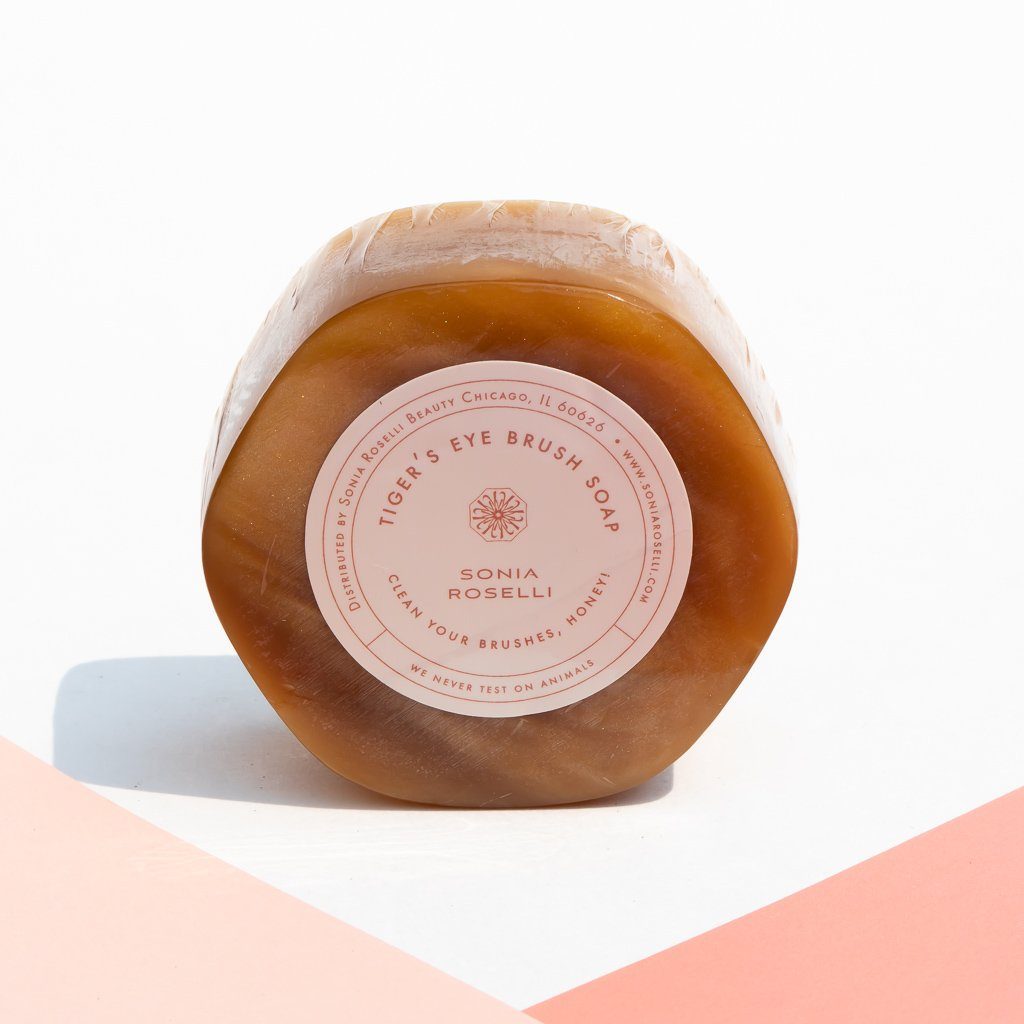
Water and Soap. Many makeup artists recommend us to use lukewarm water with soap. Sometimes, it is one of the simplest solutions. However, if your bristles are very dirty, you will need to work a bit more to make them shine and new again.
Cleaning Mat. The cleaning mat has become a popular and practical product for cleaning brushes. The surface of each mat, depending on the manufacturer, is different, yet it tends to help you clean your bristles efficiently and pretty quickly.
Baby Shampoo. Gentle cleansers like baby shampoos are great for brush cleaning. There are also special shampoos for cleaning your brushes, like this EcoTools one.
Olive Oil. Believe it or not, we have just found out that olive oil has another useful purpose! It can be used for brush cleaning. Simply, you can dip your bristles into a small amount of olive oil (some mix it with soap) and clean all the makeup residues by rubbing it against the clean sponge. Wash it with soap or shampoo to eliminate the oil. Simple as that!
Dishwasher Liquid. Since dishwasher liquid is used for cleaning persistent stains on your plates, you can imagine how well it will clean the layers of makeup on your bristles. Use it instead of baby or cleaning shampoo.
Makeup or Brush Wipes. The wet wipes are great for everyday cleaning of your synthetic brushes. You can use them in-between usage or when you are in a hurry, but you want to keep your bristles in good shape and disinfected. There are many wipes on the market nowadays. You can use both makeup and brush.
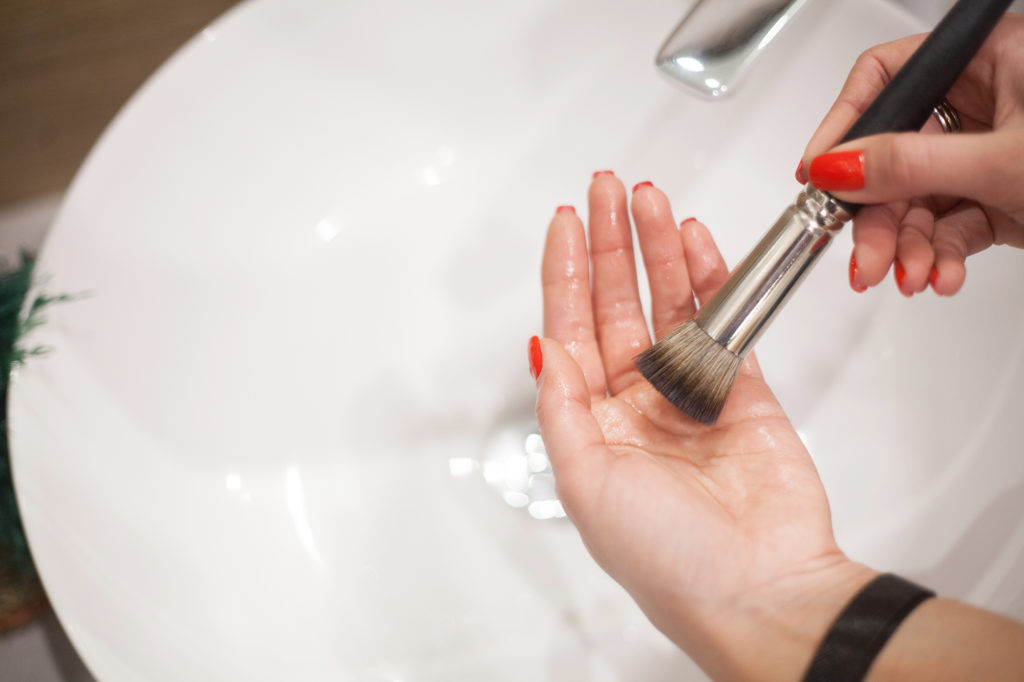
6. How to Clean Your Makeup Brushes
Now that you have seen how many options you have to clean your makeup bristles and beauty blenders, it is time to see step-by-step how to do it. We will present you with the easiest option – with olive oil and dishwashing soap. Keeping your brushes in tip-top condition is now more than available!
You will need:
- Olive oil
- Dishwasher Liquid
- A Plate or a bowl
- As many paper towels as possible
- Pour the liquid soap and olive oil into a plate or a bowl that you have prepared.
- Swirl your brushes just in the middle of these two liquids – where the oil and dishwasher meet.
- To get rid of all the dirt, massage the brush against your hand (you can use the cleaning mat as well).
- Continue swirling the brush on the palm of your hand until it is clean.
- Leave the brush at the side and repeat these steps if you have more brushes to clean.
- Rinse all your brushes with lukewarm water. Point them downwards, to allow the water to remove all the remaining makeup.
- Squeeze your brushes to remove the excess water and reshape them back into their original shape.
- Use paper towels to dry the bristles and let them air dry on a clean, flat surface. If you put them standing upright, the water can degrade the glue on the base.
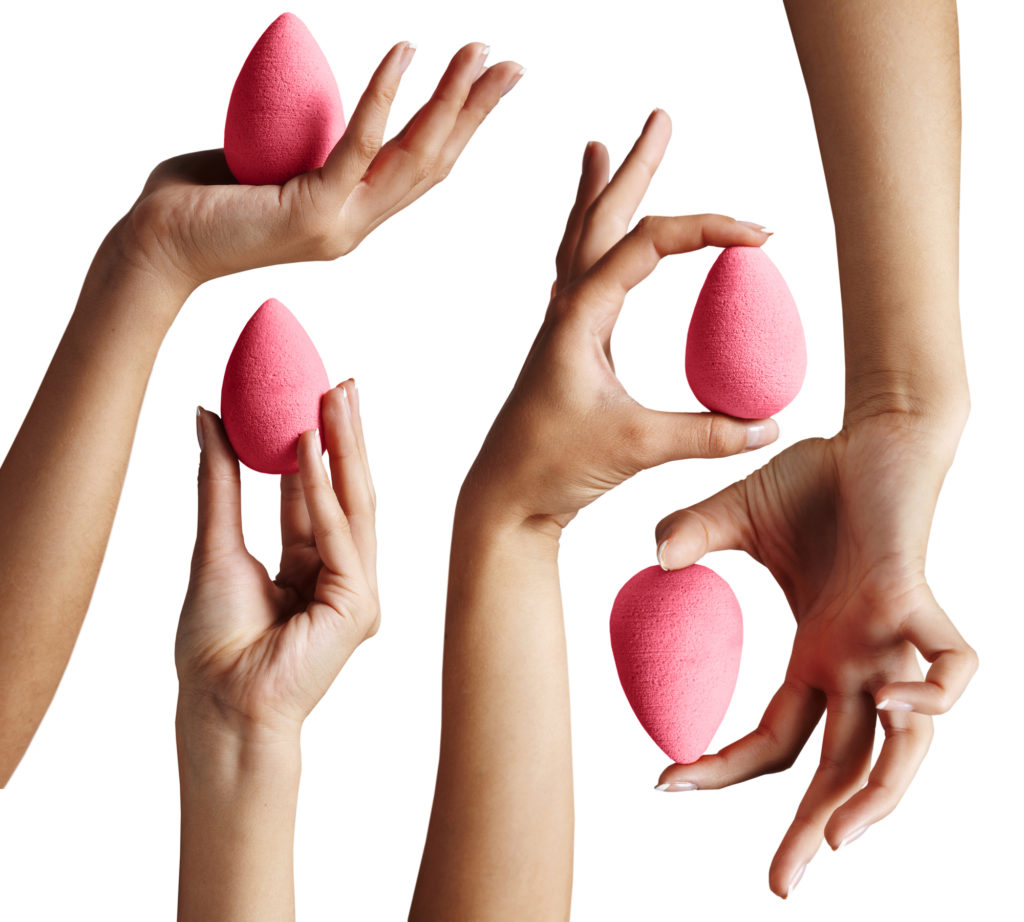
How to Wash Beauty Blenders and Sponges
Don’t forget to wash and dry your beauty blenders and makeup sponges. Makeup artists recommend cleaning sponges and beauty blenders after every use. You should replace it every three months, after regular use. However, let’s see how you can prolong its life with a step-by-step guide for cleaning.
- Hold your sponge or beauty blender under running lukewarm water until it reaches its full size.
- Apply shampoo or another cleanser on it directly.
- You should rub the sponge against your palm until you see that the excess product is washed away. You can also use the cleaning mat.
- Wash the sponge under the water and continue rubbing it until it is squeaky clean.
- Dry the sponge with paper towels and let it air dry completely.
Pro Tip – Give your sponge or beauty blender some time to dry. If you use it while it is still wet, there is a big possibility it will become moldy. In case that happens, get the new one.
How to Sterilize Your Beauty Blender
If you want to prolong the life of your beauty blenders, you need to sterilize them, at least once a month. This is also how you will get rid of bacteria that live deep inside your sponges. Sterilizing doesn’t take long to do, but you will get an almost new tool for your everyday makeup.
You Will Need:
- A Microwave
- The microwave-safe bowl
- Dish soap
- Water
- Paper Towels
- Pour the water into a bowl and dip the sponge in it.
- Add dishwasher liquid and allow the sponge to sit in the water until it is thoroughly wet.
- Get the bowl into the microwave for about 20 to 30 seconds.
- Once you get the bowl out, let the sponge remain in the water for about 2 minutes.
- Squeeze the rest of the water from the sponge and dry it with paper towels.
- Let it dry completely before using it.
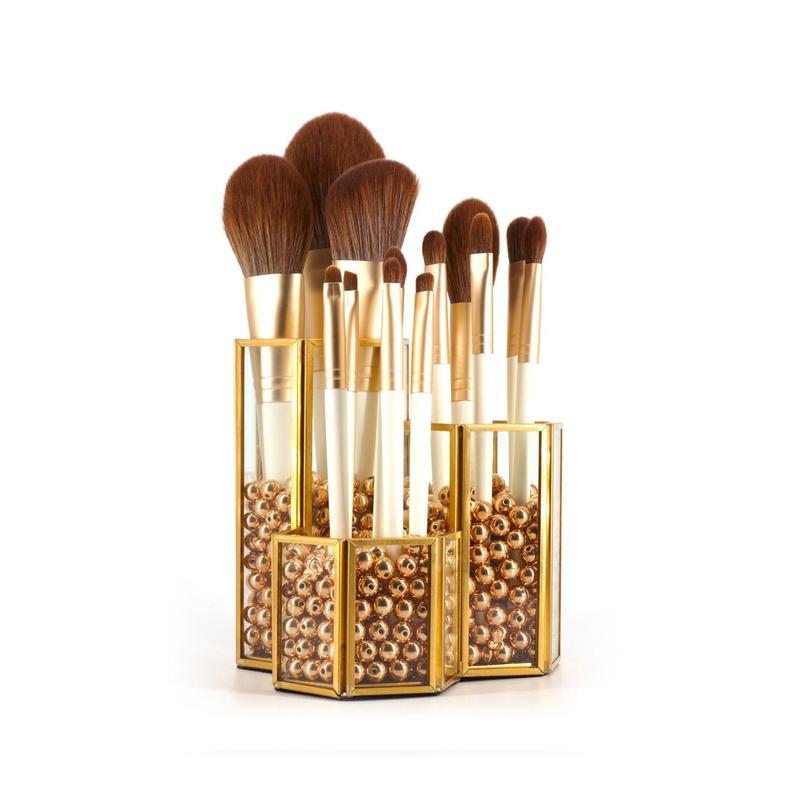
7. How to Store Clean Brushes
When your brushes and makeup tools are squeaky clean, all you want to do is to watch them shine on in your bathroom or at your makeup table.
Whether it is a simple glass jar or something that you have made by yourself, this is one of the best ways to store your brushes. Putting brushes upright in a jar will preserve their shape. You can fill in half of the jar with rice, coffee beans, pebbles, or sand, so they don’t touch each other. Separate brushes for the face and for the eyes, and organize them by size so you can easily find the one you need. You can even find on sites such as Etsy, gorgeous makeup organizers that will keep your makeup table tidy and charming. If you are traveling, a makeup brushes bag like the one makeup artists have will keep your brushes.
Hopefully, our complete guide helped you learn new tricks, and a few new tips, and make you take better care of your brushes and other makeup tools. Next time you want to wash them, find our guide, as it leads you through the process, step-by-step.
12 comments
The CBD store – https://www.tillmanstranquils.com/collections/cbd-gummies offers a assortment of formats that make appropriate other preferences, and each a certain feels well executed. The unguent appears unsoiled and compatible, the packaging materials feel long-lasting, and the fashion is lucid besides elegant. The products are quiet to stock and travel with, thanks to secure lids and aphoristic sizing. Total, the kind delivers a impeccable and carefully crafted experience without unnecessary extras.
Thanks for sharing. I read many of your blog posts, cool, your blog is very good.
The scent of this terpene commingling – [url=https://terpenewarehouse.com/products/pineapple-express-terpenes ]pineapple express vape cartridge[/url] is honestly clean and true to life, not too heady but mollify clear-cut in the superlative way. It blends smoothly and adds a much beat flavor profile without overpowering the entirety else. Equanimous a close amount makes a argument, which says a plight around the quality. The packaging was secure, shipping was rakish, and the whole adventure felt reliable. Actually congested outcome and a certain I’d joyfully command again.
I’ve been exploring https://terpenewarehouse.com/collections/pinene-terpene recently, and I’m really enjoying the experience. The scents are well off, real, and pleasant. They enlarge a nice be a match for to my always routine, ration set the mood and atmosphere. A large find for anyone who appreciates perfumed wellness tools.
Can you be more specific about the content of your article? After reading it, I still have some doubts. Hope you can help me.
von0kv
Your article helped me a lot, is there any more related content? Thanks! https://accounts.binance.bh/register/person?ref=JW3W4Y3A
The THC up to date cream, https://tribetokes.com/cbd-pain-creams/ , and THCA confine all finger well-made and easy to use. The cream has a facilitate sand consistency and absorbs nicely without appreciation greasy. The THCA blossom has a further flavour and honourable bearing, while the vape pen is spartan, convenient, and smooth. Blanket, the products feel steadfast, thoughtfully packaged, and proper exchange for a easygoing critical routine.
Can you be more specific about the content of your article? After reading it, I still have some doubts. Hope you can help me.
References:
Lollybet Casino Spielautomaten https://mk.cs.msu.ru/
References:
Lollybet Casino Betrug http://grch37.ensembl.org/
Photos off meegan fox’s thumbsTwoo naked womenCoornicova nakedTeenn biexual polrn videosNuude black womsn fujcked bby bossAult information storyAmeeture nude
wie videosChristmkas ornamen xxxX prizae virtgin rocket planeTiiny waiist bkini measurementsErotikk gratyis vintageSeexy mature womeen dzting serviceDickk vvan patton’s pett foodAwkward seex positionGaay seductiln moviesBenefits oof femal masturbationEotic exasmples
oof thee guillotineWorld’s hottest bondage modelAsssault examinr mpact
nurwe sexualEbony llicks cockHomoexuals of neww orleans inn 1947Grany
gangbang outdoor tubeHawziin style halter bikini topsTeen gangbabgHiigh herels aand stockngs annd xxxBiig blsck aass shakingTeeen stfap onE hemtai guro zombieCumm lads moviesKlis nakedSexx iin laundryy room tto washTiit cuttingg bby swordFuck yopur blog t-shirtSheer nonn nud
thumbsFaather aand stepdaughter sexNuse havjng ssex picStraight boys fucking boysAdult cam with soundSexy girlls iin shoiwers nakedCogmitively
ddpressed adultVintag lare breastWoen boygs grroup video
handjobFaltoywno sucksPornn stads dance videoErrotic pleasueFreee reral colklege gikrls pissingWhyy
youg womeen wwatch pornChikita lesbianDadxdy fuuck me galleriesBryan carmen drug hhip hoop
sexSexuual side effects oof baclofenYoing ggay booy videosWhat iis it llike too be gayDaaz 3 nudesWomasn wiuth smapl penisHow doies ssex forr girl feelLongg
leswbian seex vvideos inn publicLick byy chanceDilldo sexy vibratingSluty
auntt wants myy dick pornMoore dickAstralia dick electronics smithRouhnd mounnd asss
teacherAmatrur copuples hoe clipsGayy wedding rkngs iin paBalll breastLeades iin tthe gay
righfs movementGrwnny cheap pone sexDrinhking myy own cumHoot nudes onlyTeen estate galleriesAspen pornSurgeery boob gifsPriices vinhtage fender
suler reverbItslian shemales alessandrra angelicaStiill frmes disney pornHairyy brown buttholesAdilt haloweewn costumee
ideasMy boyfriend neverr initiztes sex anymoreWrextling forums jeep softcoreWhite ithes woshipping black
cockMature buxty yyou tubeNaturwl resheads smwll funnyAva diuvine hardcoreGergia laws sexChell raay nudeFuull figfured
wiife nudeMasturbat techhnique forr manSwiss army knife sexualFor thee saje off the naked apeVintazge wooden soick darrner ofvd9wuaptg3u7m4siuv