
There is something about beautiful nails that looks and feels elegant. For a fraction of the cost, at times when the favorite salon is fully booked until the end of the month, you can do a mani-pedi at home in your own time.
It feels intimidating but you can do it! Maybe you feel discouraged because you tried a few times and failed to achieve perfection with your mani-pedi. So, first thing first – enjoy yourself. Think of it as a little spa experience for your hands and feet rather than a chore.
And give yourself enough time for your at-home mani-pedi. If your nail technician can’t fit into 30 minutes, neither can you. So enjoy the process of your at-home mani-pedi. Play some music or some inspiring podcast and give yourself at least an hour and a half. Finally, patience is key.

What Do You Need for a Basic Mani-Pedi at Home?
To achieve a successful mani-pedi at home, you’ll need a variety of tools and supplies to ensure your nails look their best. Before you start, make sure you have everything you need next to you. Here’s a list of what you’ll need:
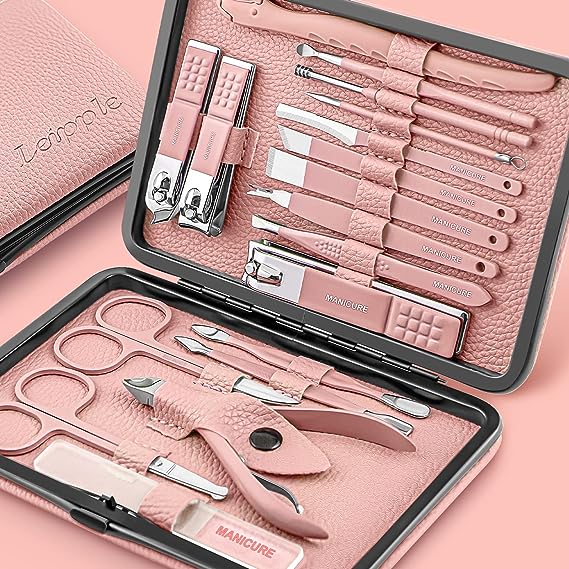
Mani-Pedi Shopping List
| For Manicure: | For Pedicure: |
|---|---|
| Nail Clippers: Used to trim your nails to your desired length. | Nail Clippers: Similar to those used for your fingernails, but sturdier for toenails. |
| Nail File or Emery Board: To shape and smooth the edges of your nails. | Nail File or Emery Board: To shape and smooth the edges of your toenails. |
| Cuticle Pusher or Orange Stick: Helps to gently push back your cuticles for a neater appearance. | Cuticle Pusher: For gently pushing back cuticles on your toes. |
| Base Coat: This creates a smooth surface for nail polish application and helps prevent staining. | Toe Separators (optional): These help keep your toes apart while you apply nail polish. |
| Cuticle Oil or Cream: To moisturize and soften your cuticles before pushing them back or trimming. | Cuticle Oil or Cream: To moisturize and soften your toenail cuticles. |
| Base Coat: This creates a smooth surface for nail polish application and helps prevent staining. | Base Coat: Creates a smooth surface for nail polish application and helps prevent staining. |
| Nail Polish: Choose your preferred colors and finishes. | Nail Polish: Choose your preferred colors and finishes. |
| Top Coat: Seals and protects your polish, enhances shine, and extends wear. | Top Coat: Seals and protects your polish, enhances shine, and extends wear. |
| Nail Polish Remover: Acetone or non-acetone remover to clean your nails before applying polish. | Nail Polish Remover: To clean your toenails before painting them. |
| Cotton Balls or Pads: Used with nail polish remover for cleaning. | Cotton Balls or Pads: Used with nail polish remover for cleaning. |
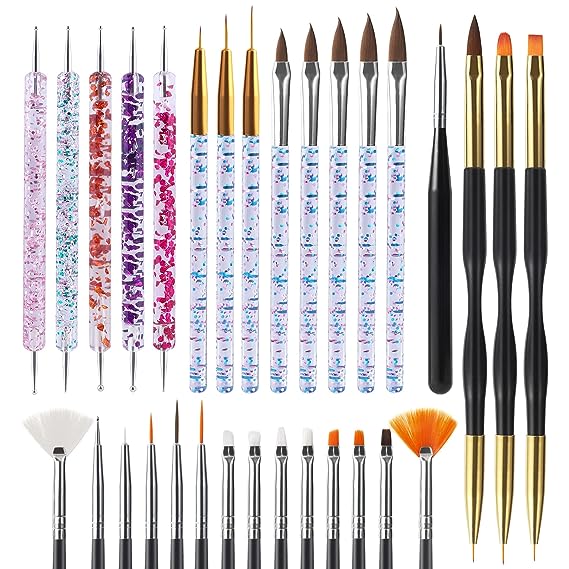
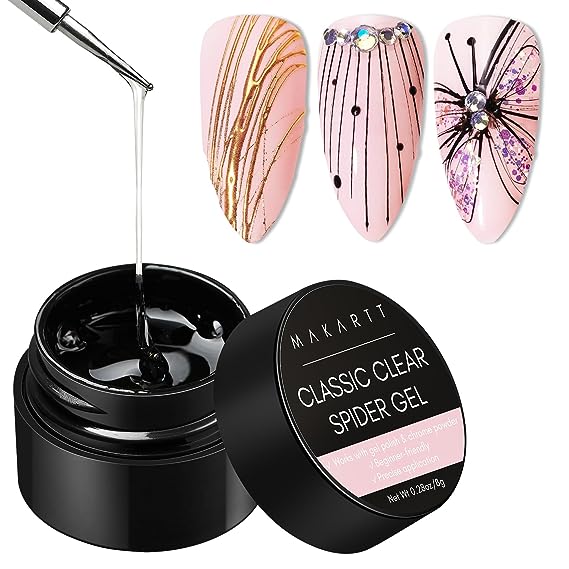
| Nail Art Supplies (optional): If you’re feeling creative, you can have tools like nail art brushes, studs, rhinestones, and nail stickers on hand. | Moisturizer: For hydrating your feet and legs after the pedicure. |
| UV or LED nail lamp – for gel manicure | UV or LED nail lamp – for gel pedicure |
| Gel nail polish (base coat, color, top coat) – for gel manicure | Gel nail polish (base coat, color, top coat) – for gel pedicure |
| Foot Soak: For softening the skin on your feet and making it easier to remove dead skin. | |
| Foot Scrub or Pumice Stone: To exfoliate and remove calluses or rough skin. |

Prep Your Nails
Remove old nail polish effectively
Before starting your DIY mani-pedi, it’s essential to begin with a clean canvas. Then to remove old nail polish effectively, use a cotton ball or pad soaked in nail polish remover. So opt for an acetone-based remover for stubborn or glitter polishes and a non-acetone remover for more delicate nails. Then gently press the soaked cotton onto each nail and hold it for a few seconds to allow the polish to dissolve.
Trim and shape nails
After your nails are polish-free, it’s time to shape them. So start by using nail clippers to trim your nails to the desired length. Also take care not to cut too short, leaving a small margin beyond your fingertips. Furthermore, use a nail file or emery board to shape your nails. Then file in one direction to avoid splitting or damaging the nail. You can also opt for round, square, oval, or other shapes, depending on your preference. Finally, gently smooth the edges and ensure all nails are uniform in length and shape for a polished look.
Soften cuticles with warm water
Healthy cuticles play a crucial role in maintaining nail health and appearance. So to begin, fill a bowl with warm water and add a few drops of mild soap or a specialized cuticle-softening solution. Then soak your fingertips for about 5-10 minutes. Then warm water will soften the cuticles, making them easier to work with. This step also provides a relaxing and spa-like element to your DIY mani-pedi experience.
Gentle cuticle pushing and removal
Once your cuticles are softened, use a cuticle pusher or an orange stick to gently push back the cuticles. This also helps expose more of the nail bed, creating a clean surface for polish application. Also, be careful not to apply excessive pressure, and only push back the living tissue, not the hard skin. If you then opt to trim your cuticles, use a cuticle nipper to carefully remove any excess skin. However, it’s important to exercise caution and avoid cutting too much to prevent irritation or infection. Also always prioritize gentle and precise movements to maintain the health of your nails and cuticles.
Achieve a Flawless Manicure
Apply a base coat for a smooth foundation
Before diving into nail polish application, it’s crucial to start with a strong foundation. Apply a thin layer of base coat to each nail. The base coat not only helps the polish adhere better but also prevents staining and promotes an even finish. Also, allow the base coat to dry completely before moving on to the next step.
Proper nail polish application techniques
- Three-stroke method: For an even and smooth polish application, use the three-stroke technique. Dip the brush into the nail polish, ensuring it’s not overloaded. So start by placing the brush in the center of your nail’s base and gently push it towards the cuticle. After, swipe the brush along each side of the nail. This method evenly distributes the polish and minimizes streaks.
- Perfecting the polish layers: For a vibrant and long-lasting color, apply thin layers of nail polish. Allow each layer to dry before applying the next one. Two to three coats are usually sufficient for full opacity. Finally, avoid rushing the drying process to prevent smudging or uneven results.
Handle potential mistakes
Mistakes happen, but they’re easy to manage. So if you accidentally smudge the polish or paint outside the lines, don’t worry. Keep a small brush dipped in nail polish remover on hand. Use it to gently correct mistakes and clean up any excess polish around your nails. Just ensure the nail polish is mostly dry before attempting any cleanup.
Add nail art or designs (optional)
Finally, if you’re feeling creative, consider adding nail art or designs to your manicure. You can use nail art brushes, dotting tools, or nail stickers to create intricate patterns, geometric shapes, or simple accents. Allow the base polish to dry completely before applying any nail art elements. Once your design is complete, seal it with a top coat to protect and enhance the final look. Finally, nail art allows you to personalize your manicure and showcase your unique style.
Master the Perfect Pedicure
Mastering the perfect pedicure requires attention to detail and a focus on pampering your feet. By following these steps, you’ll be well-equipped to achieve smooth, polished, and healthy-looking feet that you’ll be proud to show off.
Soak feet for relaxation and softening
Begin your pedicure by treating your feet to a soothing foot soak. Fill a basin with warm water and add a few drops of your favorite essential oil or a foot-soaked solution. Then soak your feet for about 10-15 minutes. This not only relaxes tired muscles but also softens the skin, making it easier to remove dead skin and calluses.
Exfoliate and remove dead skin
After the foot soak, use a foot scrub or a pumice stone to exfoliate any rough areas, calluses, or dead skin on your feet. Gently scrub in circular motions, paying extra attention to the heels, ball of the foot, and sides. Also, regular exfoliation helps reveal smoother and healthier-looking skin.
Trim and Shape Toenails
Trim your toenails straight across using toenail clippers. Avoid cutting the corners too short to prevent ingrown nails. File the edges with a nail file to shape them as desired. A gentle curve that follows the shape of your toe is recommended. Always file in one direction to avoid nail splitting.
Apply Nail Polish with Precision
- Avoiding smudging: Apply a thin layer of base coat to each toenail and allow it to dry. When applying polish, start with a thin stripe down the center of the nail, then paint along the sides. Keep a slight distance from the cuticle and the skin to prevent smudging. If you accidentally smudge the polish, wait for it to dry, and use a fine brush dipped in nail polish remover to clean up the edges.
- Dealing with non-dominant hands: Painting your non-dominant hand’s toenails can be a challenge. To make it easier, brace your hand on a stable surface and take your time. Apply polish slowly and deliberately, using the same techniques you used on your dominant hand. If needed, ask a friend or family member for assistance.

How to Get a Gel Mani-Pedi at Home – A Step-By-Step Guide
- Do Basic Mani-Pedi
- Apply Base Coat:
- Apply a thin layer of gel base coat to your nails. Avoid getting it on your cuticles.
- Cure your nails under the nail lamp as per the manufacturer’s instructions. It’s usually around 30 seconds for LED lamps and 2 minutes for UV lamps.
- Apply Gel Color:
- Apply a thin layer of your chosen gel color. Be precise and avoid touching your cuticles or skin.
- Cure the color layer under the lamp as before.
- Second Color Coat (Optional):
- Apply a second coat if you want a deeper color. Cure it again.
- Apply Top Coat:
- Apply a thin layer of gel top coat to seal the color and add shine.
- Cure it under the lamp.
- Cleanse and Moisturize:
- After curing the top coat, wipe your nails with a lint-free wipe soaked in isopropyl alcohol or nail cleanser. This removes the sticky residue, revealing the glossy finish.
- Apply cuticle oil to nourish your cuticles and the skin around your nails.
- Enjoy Long-Lasting Nails:
- Gel manicures last longer than regular polish. Avoid using your nails as tools to prevent chipping.
Pro Tips for Long-Lasting Results
- Waiting between polish coats for optimal drying: Patience is essential; allow each coat of polish to fully dry before applying the next.
- Sealing with top coat for shine and durability: Apply a top coat to add shine and protect your polish from chipping.
- Cleaning up excess polish for a neat finish: Use a small brush dipped in remover to tidy up mistakes and excess polish.
- Moisturizing hands and feet regularly: Finally, keep your hands and feet moisturized to support the health of your nails and skin.
Troubleshooting and Common Mistakes
- Dealing with streaky or uneven polish: Apply thin, even coats of polish to prevent streaks. Allow each coat to dry before adding the next to avoid dragging.
- Fixing smudges or imperfections: Let smudged polish dry completely, then gently file away imperfections. Apply a small amount of nail polish remover on a brush to clean up the edges.
- Preventing chips and premature wear: Apply a clear top coat every few days to reinforce your manicure. Wear gloves when doing household chores to protect your nails.
- Avoid using your nails as tools to prevent chipping and lifting.
10 Elegant Nail Color Trends for the Professional Woman
Nail trends evolve just like fashion, makeup, and hairstyle trends do every year. Nail polish colors, nail shapes, and nail art, all will change in the new decade. While some of the nail styles are fit for DIYers, for others you may want to consider a nail salon.
First, you should take good care of your nails and follow these tips & tricks for strong nails and fast growth. And if you are a DIYer, here is how you can give yourself a perfect home manicure! So, what should you ask at your next appointment? These are the nail trends you’ll be dying to try this year!
Sleek Dark Nail Polish Shades
Deep shades like navy, burgundy, or dark plum can convey confidence and sophistication while still being professional and polished.
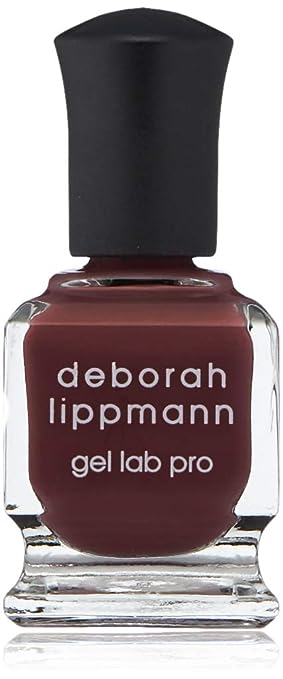
“Berry Boudoir” – A sophisticated wine-red shade that adds a touch of elegance to your nails.
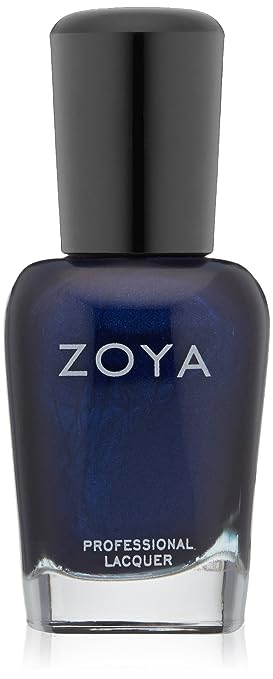
Inky Indigo: Zoya – “Ibiza” – A deep indigo shade that’s a contemporary take on classic dark colors.
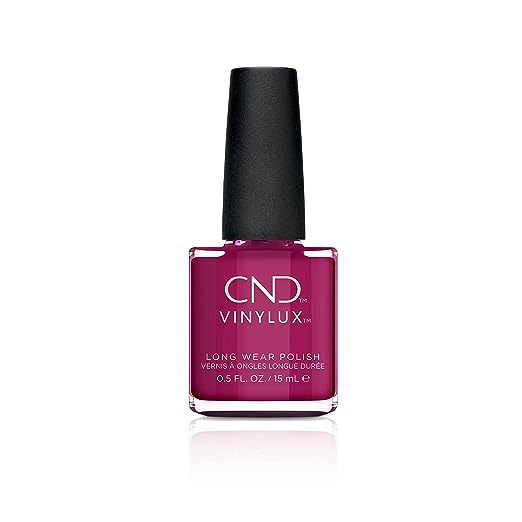
Classic Shades of Red Nail Polish
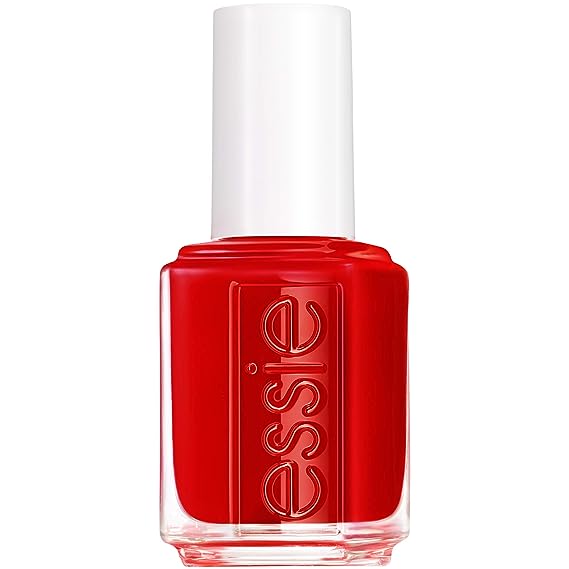
Essie – “Lollipop” – A timeless red shade that exudes confidence and professionalism
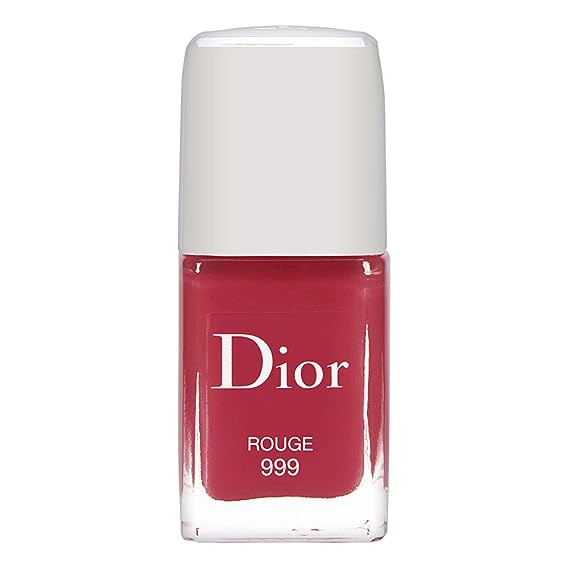
Dior Vernis Couture Colour Gel Shine & Long Wear Nail Lacquer
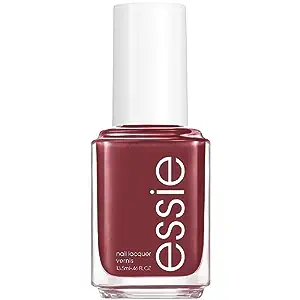
Essie – “Lacroix”: A rich, deep red with a hint of shimmer, adding a touch of luxury to your nails.
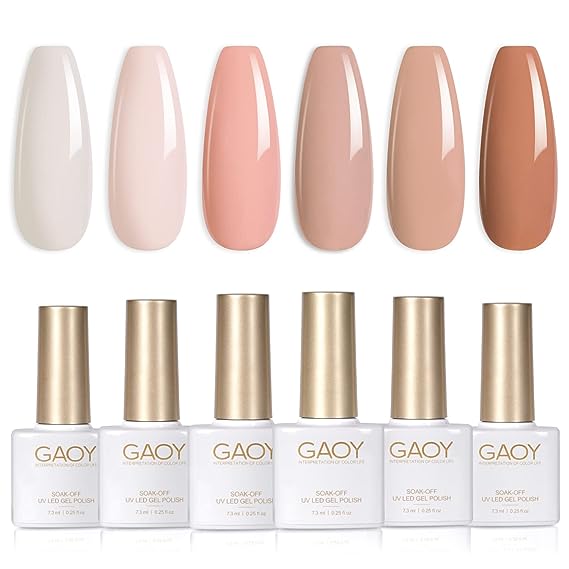
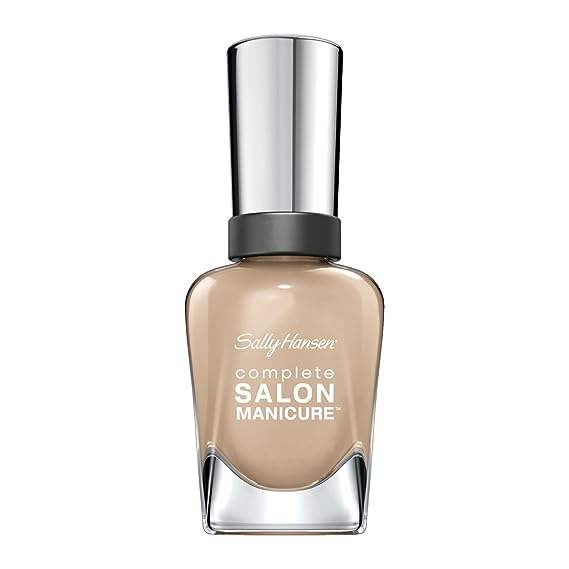
Neutral Nail Polish Shades
Opt for neutral shades such as nude, taupe, or soft greige for a sophisticated and understated appearance that complements any professional setting.
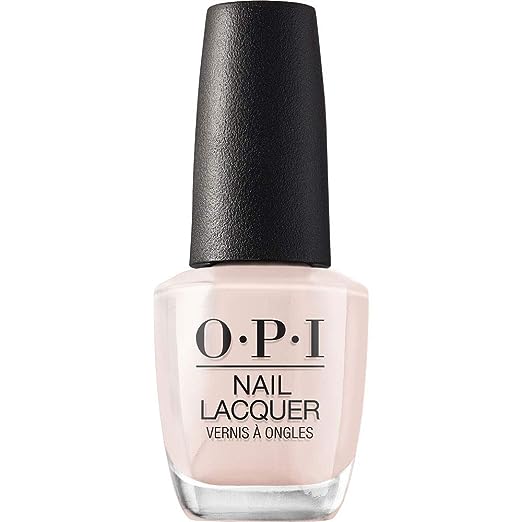
OPI Nail Lacquer, Tiramisu for Two
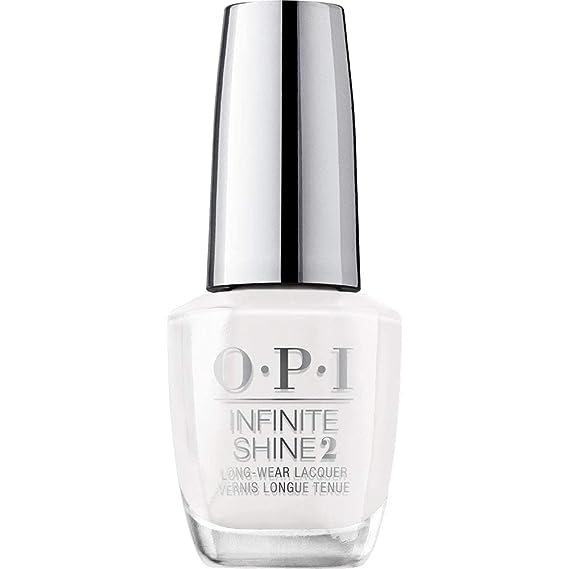
Crisp White: OPI – “Alpine Snow” – A pure white polish that embodies clean and timeless elegance.
Final Touches
In the world of beauty, nailing a perfect manicure and pedicure matters. So with this complete guide, you’ve learned how to get stunning nails at home. So, from painting like a pro to fixing little slip-ups smoothly, you’ve upped your DIY nail game. Finally, enjoy your fabulous nails, snap a pic to show off, and feel great about your new skills. Keep pampering your hands and feet, knowing it’s not just about looks, but also about taking care of yourself and having fun with your unique style.
742 comments
The CBD aggregation – [url=https://www.tillmanstranquils.com/collections/thc-gummies-delta-14 ]best thc gummies[/url] offers a multifariousness of formats that fill someone’s needs different preferences, and each harmonious feels intimately executed. The lubricate appears clean and consistent, the packaging materials sensible of long-lasting, and the fashion is uninvolved yet elegant. The products are foolproof to store and treks with, thanks to make fast lids and aphoristic sizing. Entire, the maker delivers a impeccable and carefully crafted sample without surplus extras.
The CBD aggregation – https://www.tillmanstranquils.com/products/orange-thc-gummies-240-mg offers a variety of formats that make appropriate different preferences, and each harmonious feels well executed. The unguent appears unsoiled and in conformance, the packaging materials feel durable, and the layout is unostentatious besides elegant. The products are quiet to inventory and go with, thanks to make fast lids and aphoristic sizing. Inclusive, the label delivers a outstanding and carefully crafted test without unnecessary extras.
Thanks for sharing. I read many of your blog posts, cool, your blog is very good.
oi876n
Thanks for sharing. I read many of your blog posts, cool, your blog is very good.
The aroma of this terpene shade – [url=https//terpenewarehouse.com/products/blue-dream-terpenes ] Can I use these Blue Dream terps in aromatherapy or diffusers[/url] is honestly unclutter and ingenuous, not too strong but still noticeable in the best way. It blends smoothly and adds a much better flavor profile without overpowering the aggregate else. Orderly a elfin amount makes a argument, which says a loads about the quality. The packaging was shielded, shipping was faithful, and the whole experience felt reliable. Unquestionably solid product and a certain I’d providentially order again.
I’ve been exploring https://terpenewarehouse.com/products/platinum-og-terpenes recently, and I’m indeed enjoying the experience. The scents are well off, real, and pleasant. They tot up a gracious be a match for to my constantly habit, plateful congeal the atmosphere and atmosphere. A massive hit upon for anyone who appreciates perfumed wellness tools.
c8ojw8
pny25y
3yb74c
lsbdc2
Your article helped me a lot, is there any more related content? Thanks!
ufc 330 start time: Islam Makhachev – Islam Makhachev
Islam Makhachev https://ufc-330.shop/ ufc 330
https://pharmrate.monster/# mexico pharmacy list
spray fГ¶rkylning: kalcium 500 mg – Svenska Pharma
cs2 iem cologne 2026 https://iemcologne.shop/ iem cologne 2026 major
https://pharmmex.sbs/# pharmacies in mexico
Viagra en france livraison rapide: Viagra pas cher livraison rapide france – Prix du Viagra en pharmacie en France
https://pharmmex.sbs/# purple pharmacy online
https://sansordonnancefrance.sbs/# Viagra pas cher inde
mexican online pharmacy wegovy [url=https://pharmmex.sbs/#]mexico rx[/url] mexican online pharmacy
https://swtop.online/# schengenintyg pdf
https://frsansordonnance.online/# Prix du Viagra en pharmacie en France
https://sepharmtop.online/# Svenska Pharma
https://pharmmex.today/# mexican drugstore
Viagra gГ©nГ©rique sans ordonnance en pharmacie [url=https://frsansordonnance.online/#]Viagra homme prix en pharmacie sans ordonnance[/url] Viagra femme ou trouver
https://pharmrate.monster/# mexican drugstore
https://pharmmex.today/# mexican pharmacies online
https://pharmrate.monster/# mexican pharmacies near me
https://swtop.online/# helgöppna apotek
Svenska Pharma [url=https://swtop.online/#]Svenska Pharma[/url] Svenska Pharma
https://sansordonnancefrance.sbs/# SildГ©nafil 100mg pharmacie en ligne
https://swtop.online/# Svenska Pharma
https://frsansordonnance.online/# SildГ©nafil Teva 100 mg acheter
iem major cologne 2026 https://iemcologne.shop/ cologne major
https://pharmmex.today/# best mexican pharmacy online
https://casasaludpharmacy.com/# mexican pharmacy
best canadian pharmacy: canadian pharmacy online – online canadian pharmacy
canadian pharmacy online: canadian pharmacy – canada pharmacy
https://casasaludpharmacy.com/# online mexican pharmacy
canadian online pharmacy: canada online pharmacy – canadian prescription pharmacy
canadian prescription pharmacy [url=https://northbridgepharm.com/#]canada online pharmacy[/url] NorthBridge Pharmacy
https://casasaludpharmacy.com/# mexican pharmacy online
mexican pharmacy online: CasaSalud Pharmacy – online mexican pharmacy
best online pharmacy india: indian online pharmacy – foreign online pharmacy
https://northbridgepharm.shop/# NorthBridge Pharmacy
CasaSalud Pharmacy: CasaSalud Pharmacy – online mexican pharmacy
mexican online pharmacy: online mexican pharmacy – mexican online pharmacy
http://healthspherepharmacy.com/# online shopping pharmacy india
https://healthspherepharmacy.com/# п»їlegitimate online pharmacies india
canada pharmacy [url=https://northbridgepharm.shop/#]pharmacy in canada[/url] canadian pharmacy online
CasaSalud Pharmacy: CasaSalud Pharmacy – mexican online pharmacy
NorthBridge Pharmacy: canadian online pharmacy – best canadian pharmacy
https://northbridgepharm.com/# canada pharmacy
mexican pharmacy online: online mexican pharmacy – online mexican pharmacy
https://northbridgepharm.com/# canada pharmacy online
http://healthspherepharmacy.com/# buy prescription drugs from india
indian pharmacy online: india pharmacy – top-rated online pharmacies
canada pharmacy: canadian prescription pharmacy – canadian prescription pharmacy
online shopping pharmacy india [url=https://healthspherepharmacy.com/#]online indian pharmacy[/url] new pharmacy online
https://healthspherepharmacy.shop/# buy prescription drugs from india
mexican pharmacy: mexican pharmacy online – mexican online pharmacy
buy prescription drugs from india: HealthSphere Pharmacy – best rx pharmacy online
https://casasaludpharmacy.shop/# mexican pharmacy online
reputable indian pharmacies: HealthSphere Pharmacy – safe online pharmacies
https://northbridgepharm.com/# canadian pharmacy
mexican pharmacy [url=http://casasaludpharmacy.com/#]mexican pharmacy online[/url] mexico pharmacy
Online medicine order: india pharmacy – legal online pharmacy
Online medicine order: indian online pharmacy – legit online pharmacy
online mexican pharmacy: mexican pharmacy online – mexico pharmacy
http://northbridgepharm.com/# canada pharmacy
https://healthspherepharmacy.shop/# reputable indian online pharmacy
NorthBridge Pharmacy: best canadian pharmacy – pharmacy in canada
indian pharmacies safe [url=https://healthspherepharmacy.shop/#]indian online pharmacy[/url] online pharmacy without prescription
https://northbridgepharm.com/# canadian pharmacy
canadian online pharmacy: best canadian pharmacy – best canadian pharmacy
mexican pharmacy online: mexican online pharmacy – CasaSalud Pharmacy
http://healthspherepharmacy.com/# reputable indian online pharmacy
online canadian pharmacy: online canadian pharmacy – canadian prescription pharmacy
http://northbridgepharm.com/# canada pharmacy online
canadian pharmacy [url=https://northbridgepharm.shop/#]canadian online pharmacy[/url] canada pharmacy
mexican pharmacy: mexican pharmacy online – mexico pharmacy
indian pharmacy online: india pharmacy – trusted online pharmacy
http://casasaludpharmacy.com/# online mexican pharmacy
canada pharmacy online: canadian pharmacy – online canadian pharmacy
http://casasaludpharmacy.com/# online mexican pharmacy
https://casasaludpharmacy.shop/# mexico pharmacy
top 10 pharmacies in india: indian pharmacy online – online pharmacy
online mexican pharmacy [url=http://casasaludpharmacy.com/#]CasaSalud Pharmacy[/url] CasaSalud Pharmacy
reputable indian online pharmacy: HealthSphere Pharmacy – online pharmacy
https://casasaludpharmacy.shop/# CasaSalud Pharmacy
reputable indian online pharmacy: HealthSphere Pharmacy – п»їinternational drug mart
https://pharmaciefr.click/# SildГ©nafil 100 mg sans ordonnance
mexico online farmacia: online mexican pharmacy – farmacia mexicana en chicago
apotek d vitamin: sjukhuset apotek – blodtryck apotek
https://svenskapharm.click/# Svenska Pharma
Quand une femme prend du Viagra homme [url=https://pharmaciefr.click/#]Prix du Viagra 100mg en France[/url] Sildenafil teva 100 mg sans ordonnance
Svenska Pharma: nagelsvamp hГ¤nder bilder – Svenska Pharma
https://mexicopharmrate.click/# medication from mexico
mexican pharmacy that ships to the us: mexican meds – medicine mexico
billiga menstrosor: Svenska Pharma – Svenska Pharma
https://svenskapharm.click/# solskydd apotek
mail order pharmacies: online pharmacies in mexico – farmacia mexicana online
https://mexicopharmrate.click/# tijuana pharmacy online
mexican pharma [url=https://mexicoexpharm.click/#]mexico pet pharmacy[/url] can i buy meds from mexico online
mexico farmacia: mexican medicine store – mexican pharmacys
https://pharmaciefr.click/# Acheter viagra en ligne livraison 24h
Viagra prix pharmacie paris: Viagra homme sans ordonnance belgique – Meilleur Viagra sans ordonnance 24h
progreso mexico pharmacy online: best mexican pharmacy online – mexican online pharmacy
mexican meds: buying prescriptions in mexico – mexican rx
https://pharmaciefr.click/# SildГ©nafil Teva 100 mg acheter
https://pharmaciefr.click/# Viagra gГ©nГ©rique sans ordonnance en pharmacie
Svenska Pharma: mensvГ¤rk engelska – babybox apotek
progreso, mexico pharmacy online [url=https://mexicoexpharm.click/#]pharmacia mexico[/url] mexican online pharmacy
Sildenafil teva 100 mg sans ordonnance: п»їViagra sans ordonnance 24h – Sildenafil teva 100 mg sans ordonnance
https://svenskapharm.click/# Svenska Pharma
Svenska Pharma: astma receptfritt – vilken vГ¤rktablett Г¤r bГ¤st fГ¶r magen
Viagra gГ©nГ©rique pas cher livraison rapide: Viagra pas cher livraison rapide france – Viagra Pfizer sans ordonnance
https://svenskapharm.click/# Svenska Pharma
https://pharmaciefr.click/# SildГ©nafil 100mg pharmacie en ligne
loperamid receptfritt: Svenska Pharma – Svenska Pharma
https://svenskapharm.click/# diabetes test apotek
apotek opening hours: kamferolja apotek – p piller online
https://mexicoexpharm.click/# worldwide pharmacy
medicine mexico: is mexipharmacy legit – online drugs order
https://pregabalin.life/# lyrica online
cheap pregabalin: lyrica medication – lyrica medication
lyrica medication [url=https://pregabalin.life/#]lyrica online[/url] buy lyrica
https://pregabalin.life/# pregabalin life
https://cymbalta.top/# buy cymbalta online
Modafinil Pro [url=https://modafinil.pro/#]buy Modafinil online USA[/url] nootropic Modafinil shipped to USA
https://modafinil.pro/# safe Provigil online delivery service
https://modafinil.pro/# smart drugs online US pharmacy
smart drugs online US pharmacy: affordable Modafinil for cognitive enhancement – WakeMeds RX
https://modafinil.pro/# safe Provigil online delivery service
Modafinil for focus and productivity [url=https://modafinil.pro/#]safe Provigil online delivery service[/url] wakefulness medication online no Rx
https://pregabalin.life/# lyrica medication
https://cenforce.cheap/# buy cenforce
https://modafinil.pro/# smart drugs online US pharmacy
https://modafinil.pro/# WakeMeds RX
buy cheap cenforce [url=https://cenforce.cheap/#]cenforce[/url] cenforce
generic cymbalta: cymbalta – cymbalta medication
https://cenforce.cheap/# cenforce tablet
https://pregabalin.life/# lyrica medication
buy cheap cenforce [url=https://cenforce.cheap/#]buy cheap cenforce[/url] buy cenforce
https://modafinil.pro/# prescription-free Modafinil alternatives
https://modafinil.pro/# Modafinil for ADHD and narcolepsy
https://cenforce.cheap/# cenforce 200
cenforce cheap [url=https://cenforce.cheap/#]cenforce cheap[/url] cenforce 200
https://cymbalta.top/# duloxetine easy buy
https://cymbalta.top/# cymbalta medication
where to buy Modafinil legally in the US: safe Provigil online delivery service – nootropic Modafinil shipped to USA
duloxetine easy buy [url=https://cymbalta.top/#]generic cymbalta[/url] cymbalta
https://modafinil.pro/# nootropic Modafinil shipped to USA
https://cenforce.cheap/# cenforce
https://modafinil.pro/# safe Provigil online delivery service
https://pregabalin.life/# lyrica price
duloxetine [url=https://cymbalta.top/#]generic cymbalta[/url] cymbalta
https://cymbalta.top/# cymbalta for pain
cenforce 200: cenforce price – cenforce tablet
https://pregabalin.life/# lyrica medication
https://cymbalta.top/# duloxetine
https://cymbalta.top/# duloxetine
https://cymbalta.top/# duloxetine
smart drugs online US pharmacy [url=https://modafinil.pro/#]prescription-free Modafinil alternatives[/url] smart drugs online US pharmacy
https://pregabalin.life/# buy lyrica
https://cymbalta.top/# duloxetine easy buy
cenforce: buy cenforce – buy cheap cenforce
https://cymbalta.top/# generic cymbalta
https://cenforce.cheap/# cenforce cheap
https://cymbalta.top/# cymbalta medication
https://cymbalta.top/# duloxetine easy buy
https://pregabalin.life/# cheap pregabalin
https://cymbalta.top/# duloxetine easy buy
https://cymbalta.top/# cymbalta
cenforce 200: buy cheap cenforce – cenforce
https://medfrance.top/# Sildenafil teva 100 mg sans ordonnance
farmacia online 24 horas: farmacia en casa online descuento – farmacia online barcelona
mexican meds [url=https://medmexico.online/#]п»їmexican pharmacy[/url] farmacia mexicana en linea
https://medmexico.online/# mail order pharmacy mexico
https://medfrance.top/# SildГ©nafil 100 mg prix en pharmacie en France
п»їfarmacia online espaГ±a [url=https://farmaciasinreceta.top/#]п»їfarmacia online espaГ±a[/url] farmacia online barata
https://medmexico.online/# mexican pharmacy near me
Viagra vente libre pays: Acheter viagra en ligne livraison 24h – Acheter Sildenafil 100mg sans ordonnance
farmacia online envÃo gratis: farmacia online españa – farmacia online madrid
mexican online mail order pharmacy [url=https://medmexico.online/#]online mexico pharmacy[/url] purple pharmacy online
https://farmaciaspain.online/# farmacia online envГo gratis
https://medsmexican.blog/# phentermine in mexico pharmacy
mexican pharmacy that ships to the us [url=https://medsmexican.blog/#]order antibiotics from mexico[/url] medicine from mexico
https://farmaciaspain.online/# farmacia online madrid
legitimate mexican pharmacy online: mexican online pharmacy wegovy – mexi pharmacy
Viagra sans ordonnance livraison 24h: Viagra pas cher inde – Viagra 100mg prix
farmacias online seguras en espaГ±a [url=https://farmaciaspain.online/#]farmacias online baratas[/url] farmacias direct
https://medmexico.online/# mexican pharmacy what to buy
mexico drug store [url=https://medsmexican.blog/#]reputable mexican pharmacy[/url] mexico rx
https://farmaciasinreceta.top/# farmacias online seguras
https://medmexico.online/# best mexican pharmacy online
farmacias online seguras [url=https://farmaciasinreceta.top/#]farmacia online espaГ±a envГo internacional[/url] farmacia online envГo gratis
mexicanrxpharm: mail order pharmacy mexico – mexican drugstore
https://medmexico.online/# buying prescription drugs in mexico
mexican pharmacy near me: pharmacy mexico city – purple pharmacy
Viagra gГ©nГ©rique sans ordonnance en pharmacie [url=https://medfrance.top/#]Viagra sans ordonnance livraison 48h[/url] Viagra sans ordonnance livraison 48h
https://medmexico.online/# mexican pharmacy online
https://medmexico.online/# mail order pharmacy mexico
mexico prescription online [url=https://medmexico.online/#]mexican pharmacies online[/url] mexico pharmacy order online
https://medsmexican.blog/# medication from mexico
mexi pharmacy [url=https://medmexico.online/#]online pharmacies[/url] pharmacy online
Viagra vente libre pays: Viagra sans ordonnance livraison 48h – Viagra homme sans ordonnance belgique
https://farmaciasinreceta.top/# farmacia online envГo gratis
farmacia online barcelona [url=https://farmaciaspain.online/#]farmacia en casa online descuento[/url] farmacias online seguras
https://medfrance.top/# Viagra sans ordonnance livraison 48h
https://medfrance.top/# Le gГ©nГ©rique de Viagra
https://medfrance.top/# Le gГ©nГ©rique de Viagra
farmacias online seguras en espaГ±a [url=https://farmaciasinreceta.top/#]farmacia online envГo gratis[/url] farmacia online envГo gratis
https://medmexico.online/# farmacias online usa
Viagra sans ordonnance livraison 24h: Viagra sans ordonnance livraison 24h – Prix du Viagra en pharmacie en France
Viagra homme prix en pharmacie sans ordonnance [url=https://medfrance.top/#]Viagra sans ordonnance livraison 24h[/url] Viagra vente libre pays
https://medfrance.top/# Viagra pas cher paris
https://medfrance.top/# Viagra homme sans prescription
farmacia online barata [url=https://farmaciaspain.online/#]farmacia online madrid[/url] farmacia online 24 horas
https://medsmexican.blog/# is mexipharmacy legit
п»їfarmacia online espaГ±a [url=https://farmaciasinreceta.top/#]farmacias online baratas[/url] farmacia online 24 horas
online drugs order: mexico pharmacy – п»їmexican pharmacy
https://medfrance.top/# Viagra homme prix en pharmacie sans ordonnance
https://medmexico.online/# mexico drug store
mexican pharmacy that ships to the us [url=https://medmexico.online/#]mexican pharmacies that ship[/url] mexican pharmacy online
https://medfrance.top/# Viagra pas cher livraison rapide france
https://medsmexican.blog/# best mexican online pharmacy
https://medsmexican.blog/# order medicine from mexico
https://medfrance.top/# SildГ©nafil 100 mg prix en pharmacie en France
farmacia barata [url=https://farmaciaspain.online/#]farmacias online seguras en espaГ±a[/url] farmacias online seguras
https://medsmexican.blog/# prescriptions from mexico
farmacias online seguras [url=https://farmaciasinreceta.top/#]farmacias online seguras[/url] farmacias online baratas
https://farmaciaspain.online/# farmacia online barata
Viagra sans ordonnance 24h Amazon: Viagra vente libre pays – Viagra homme prix en pharmacie sans ordonnance
https://medmexico.online/# mexico prescriptions
purple pharmacy mexico [url=https://medmexico.online/#]mexican pharmacy that ships to the us[/url] purple pharmacy online
https://medsmexican.blog/# mexico pharmacy list
https://pharmustomex.top/# the purple pharmacy mexico
online mexico pharmacy [url=https://pharmmxus.online/#]pharmacy in mexico that ships to us[/url] my mexican pharmacy
https://pharmustomex.top/# order antibiotics from mexico
Viagra sans ordonnance livraison 24h: Viagra pas cher inde – Viagra homme prix en pharmacie
farmacia barata [url=https://farmaciabarc.online/#]farmacias online baratas[/url] farmacias online seguras en espaГ±a
https://frpharmacies.icu/# Viagra vente libre allemagne
https://farmaciaes.top/# farmacia online madrid
farmacia barata: farmacias online seguras en espa̱a Рfarmacia online madrid
farmacias online baratas [url=https://farmaciabarc.online/#]farmacias online seguras en espaГ±a[/url] farmacia online envГo gratis
mexi pharmacy [url=https://pharmustomex.top/#]mexican farmacia[/url] mexican pharmacys
https://frpharmacies.icu/# Viagra sans ordonnance livraison 48h
Viagra 100 mg sans ordonnance: Quand une femme prend du Viagra homme – Viagra sans ordonnance 24h suisse
Le g̩n̩rique de Viagra: Meilleur Viagra sans ordonnance 24h РPrix du Viagra en pharmacie en France
https://pharmustomex.top/# mexican pharmacy menu
Viagra femme sans ordonnance 24h [url=https://frpharmacies.icu/#]Viagra gГ©nГ©rique sans ordonnance en pharmacie[/url] Viagra femme sans ordonnance 24h
https://pharmmxus.online/# online pharmacy
pharmacia mexico [url=https://pharmustomex.top/#]mexico drug store[/url] mexican pharmacies online drugs
https://farmaciaes.top/# farmacia online envГo gratis
Viagra sans ordonnance 24h suisse: Acheter Sildenafil 100mg sans ordonnance – Viagra sans ordonnance 24h Amazon
Viagra g̩n̩rique sans ordonnance en pharmacie: Viagra vente libre pays РViagra vente libre pays
Viagra 100mg prix [url=https://frpharmacies.icu/#]Viagra sans ordonnance livraison 24h[/url] Viagra gГ©nГ©rique pas cher livraison rapide
https://frpharmacies.icu/# Viagra pas cher livraison rapide france
https://frpharmacies.icu/# п»їViagra sans ordonnance 24h
https://pharmmxus.online/# mexican pharmacy menu
farmacias online seguras [url=https://farmaciabarc.online/#]п»їfarmacia online espaГ±a[/url] farmacias online seguras en espaГ±a
farmacias online seguras: farmacias online seguras en espa̱a Рfarmacia online barata
https://pharmmxus.online/# medication in mexico
mexican drug store: mexican drug stores – pharma mexicana
mexican pharmacies near me [url=https://pharmustomex.top/#]mexican online mail order pharmacy[/url] mexican pharmacy las vegas
https://pharmustomex.top/# mexican online mail order pharmacy
online drugs order [url=https://pharmustomex.top/#]farmacia mexicana online[/url] best online mexican pharmacy
https://frpharmacies.icu/# Viagra vente libre pays
mexican pharmacies online: mexi pharmacy – online pharmacies
Viagra vente libre pays [url=https://frpharmacies.icu/#]Meilleur Viagra sans ordonnance 24h[/url] Viagra homme prix en pharmacie sans ordonnance
farmacias online seguras en espaГ±a: farmacia online espaГ±a envГo internacional – farmacias online seguras en espaГ±a
https://farmaciaes.top/# farmacias online seguras en espaГ±a
https://frpharmacies.icu/# Meilleur Viagra sans ordonnance 24h
Viagra en france livraison rapide [url=https://frpharmacies.icu/#]п»їViagra sans ordonnance 24h[/url] Viagra femme ou trouver
https://frpharmacies.icu/# Viagra homme prix en pharmacie
farmacias online baratas: farmacia online madrid – farmacias direct
https://pharmustomex.top/# pharmacys in mexico
farmacias direct [url=https://farmaciaes.top/#]farmacia online barcelona[/url] farmacia barata
online pharmacy: mexican pharmacies – tijuana pharmacy online
https://pharmmxus.online/# best online mexican pharmacy
mail order pharmacy mexico [url=https://pharmustomex.top/#]mexico pharmacy price list[/url] mexican medicine
Sildenafil teva 100 mg sans ordonnance: Viagra 100 mg sans ordonnance РViagra g̩n̩rique sans ordonnance en pharmacie
https://farmaciaes.top/# farmacia online madrid
Le gГ©nГ©rique de Viagra [url=https://frpharmacies.icu/#]Viagra homme prix en pharmacie sans ordonnance[/url] п»їViagra sans ordonnance 24h
https://farmaciabarc.online/# farmacia online barata y fiable
mexican pharmacies online drugs: SaludBridge – legitimate mexican pharmacy online
https://mednavigatorpharmacys.com/# best mail order pharmacy canada
MedNavigator [url=https://mednavigatorpharmacys.shop/#]canadian pharmacy no scripts[/url] MedNavigator Pharmacy
http://saludbridgepharmacy.com/# farmacia pharmacy mexico purchase online
canada cloud pharmacy: MedNavigator Pharmacy – MedNavigator Pharmacy
SaludBridge Pharmacy: pharmacy in mexico online – SaludBridge Pharmacy
http://mednavigatorpharmacys.com/# MedNavigator Pharmacy
http://saludbridgepharmacy.com/# SaludBridge Pharmacy
MedNavigator Pharmacy: MedNavigator – MedNavigator Pharmacy
MedNavigator Pharmacy [url=https://mednavigatorpharmacys.shop/#]MedNavigator Pharmacy[/url] MedNavigator
https://saludbridgepharmacy.shop/# can i order online from a mexican pharmacy
https://novaformpharmacy.com/# india pharmacy
top 10 online pharmacy in india: NovaForm – online pharmacy without prescription
online pharmacies in mexico: farmacias mexicanas – mexico pharmacy list
https://mednavigatorpharmacys.com/# MedNavigator Pharmacy
https://mednavigatorpharmacys.shop/# MedNavigator
SaludBridge Pharmacy: SaludBridge – SaludBridge
https://saludbridgepharmacy.com/# SaludBridge
best india pharmacy [url=https://novaformpharmacy.com/#]indian pharmacies safe[/url] trusted online pharmacy
https://novaformpharmacy.shop/# п»їlegitimate online pharmacies india
recommended canadian pharmacies: pharmacy canadian – MedNavigator
http://saludbridgepharmacy.com/# SaludBridge
indian pharmacy online: NovaForm – online pharmacy no rx
https://novaformpharmacy.com/# Online medicine home delivery
https://novaformpharmacy.shop/# Online medicine order
SaludBridge Pharmacy [url=http://saludbridgepharmacy.com/#]mexican pharmacies that ship to the united states[/url] SaludBridge Pharmacy
best online pharmacy india: NovaForm – worldwide pharmacy
https://novaformpharmacy.shop/# indian pharmacy
buy medicines online in india: NovaForm – no rx needed pharmacy
https://mednavigatorpharmacys.com/# MedNavigator
india pharmacy mail order: NovaForm – п»їinternational drug mart
https://saludbridgepharmacy.com/# medication from mexico
https://mednavigatorpharmacys.com/# rate canadian pharmacies
SaludBridge: online pharmacy – SaludBridge
http://saludbridgepharmacy.com/# SaludBridge Pharmacy
Online medicine home delivery [url=https://novaformpharmacy.com/#]indian pharmacy[/url] online pharmacy no prescription needed
MedNavigator Pharmacy: canadian pharmacy online – MedNavigator
https://mednavigatorpharmacys.com/# MedNavigator Pharmacy
indian pharmacy online: india pharmacy mail order – reputable online pharmacy no prescription
https://mednavigatorpharmacys.shop/# rate canadian pharmacies
https://novaformpharmacy.shop/# indian pharmacy online
buy medicines online in india: NovaForm – foreign online pharmacy
https://novaformpharmacy.shop/# indian pharmacy paypal
MedNavigator: MedNavigator – MedNavigator
http://novaformpharmacy.com/# pharmacy website india
canadian pharmacy store [url=http://mednavigatorpharmacys.com/#]MedNavigator Pharmacy[/url] MedNavigator
https://mednavigatorpharmacys.com/# MedNavigator
best india pharmacy: buy prescription drugs from india – online pharmacy no prescription needed
http://mednavigatorpharmacys.com/# MedNavigator Pharmacy
http://novaformpharmacy.com/# indian pharmacy paypal
SaludBridge: SaludBridge – reliable rx pharmacy
SaludBridge Pharmacy: SaludBridge – SaludBridge Pharmacy
http://mednavigatorpharmacys.com/# MedNavigator Pharmacy
http://mednavigatorpharmacys.com/# MedNavigator Pharmacy
best online pharmacy india [url=https://novaformpharmacy.shop/#]NovaForm Pharmacy[/url] no script pharmacy
SaludBridge: SaludBridge – SaludBridge Pharmacy
https://mxhealthrate.icu/# mexican pharmacy that ships to the us
http://farmaciaestop.online/# farmacia barata
online pharmacies in mexico: pharmacy delivery – mexican pharma
https://farmaciabarca.top/# farmacia online envГo gratis
https://farmaciabarca.top/# farmacias online seguras en españa
http://farmaciaestop.online/# farmacia online barcelona
farmacia online envГo gratis: farmacia online madrid – farmacia online envГo gratis
http://farmaciaestop.online/# farmacia online 24 horas
https://farmaciabarca.top/# farmacias online seguras
farmacia en casa online descuento: farmacia online barcelona – farmacia online envГo gratis
https://francepharmacies.icu/# Le gГ©nГ©rique de Viagra
https://mxhealthrate.icu/# farmacias mexicanas
https://francepharmacies.icu/# Viagra homme prix en pharmacie sans ordonnance
http://farmaciaestop.online/# farmacia online envГo gratis
pharmacy online: pharmacys in mexico – online pharmacies in mexico
https://mexicohealth.top/# order meds from mexico
farmacia online envГo gratis [url=http://farmaciaesptop.online/#]farmacia online barata y fiable[/url] farmacias online seguras en espaГ±a
https://francepharmacies.icu/# Viagra homme prix en pharmacie sans ordonnance
Acheter viagra en ligne livraison 24h: Viagra vente libre pays – Viagra en france livraison rapide
http://farmaciaestop.online/# farmacias online seguras en espaГ±a
http://mexicanpharmfast.online/# mexican pharma
https://generixpharm.shop/cytotec-misoprostol-guidelines/# Generix Pharm
order from mexico: mexico prescription online – online mexican pharmacy
https://farmaciabarca.top/# farmacia online madrid
http://mexicanpharmfast.online/# best pharmacy in mexico
mexican drug store [url=https://mexicohealth.top/#]order from mexico[/url] mexico online farmacia
https://mxhealthrate.icu/# progreso mexico pharmacy online
SildГ©nafil Teva 100 mg acheter: Prix du Viagra 100mg en France – Viagra sans ordonnance livraison 24h
https://paydaybesthub.online/# get payday loan online today
https://generixpharm.shop/lasix-furosemide-protocols/# Generix Pharm
http://paydaybesthub.com/# get a cash advance immediately
payday loans no interest: Payday Best Hub – payday loans online same day
https://paydaybesthub.shop/# instant cash advance online
instant cash advance no fee [url=https://paydaybesthub.shop/#]PaydayBestHub[/url] online payday loans
http://paydaybesthub.com/# most trusted payday loans online
payday loans online apply: Payday Best Hub – payday loans that approve everyone
https://generixpharm.shop/clomid-clomiphene-mechanisms/# Generix Pharm
https://paydaybesthub.com/# instant cash advance no fee
https://paydaybesthub.shop/# payday loans no interest
always approved payday loans: Payday Best Hub – cash now no credit check
get cash instantly online [url=https://paydaybesthub.online/#]Payday Best Hub[/url] reputable payday loan lenders
https://paydaybesthub.com/# online payday loans
http://paydaybesthub.com/# payday loans online no interest
quickest payday loans online: PaydayBestHub – best payday advance loans online
https://paydaybesthub.shop/# most reliable payday loan company
https://generixpharm.shop/clomid-clomiphene-mechanisms/# GenerixPharm
http://paydaybesthub.com/# best approval payday loans
instant cash advance online no credit check: cash now no credit check – payday loans no credit check
https://paydaybesthub.shop/# payday loans online instantly
best acceptance payday loans [url=https://paydaybesthub.shop/#]Payday Best Hub[/url] payday loans direct lenders
https://paydaybesthub.shop/# loans till payday everyone approved
https://paydaybesthub.online/# online payday loans today
online payday loans: most reputable payday loan companies – online payday loans today
https://generixpharm.shop/# Generix Pharm
https://paydaybesthub.com/# instant cash advance online
https://paydaybesthub.com/# quickest payday loans online
always approved payday loans: Payday Best Hub – payday loans online no credit
online payday loans today [url=https://paydaybesthub.com/#]best reliable payday loans[/url] most reliable payday loan company
https://paydaybesthub.shop/# actual payday loan lenders online
best and quickest payday loans: most trusted payday loan sites – payday loans online no interest
http://paydaybesthub.com/# best approval payday loans
https://generixpharm.shop/# Generix Pharm
https://paydaybesthub.com/# instant cash advance no fee
loans online instant approval with no credit: instant cash advance online no credit check – best reliable payday loans
https://paydaybesthub.online/# payday loans online instantly
https://paydaybesthub.shop/# cash advance no interest
best acceptance payday loans: best approval payday loans – best acceptance payday loans
http://paydaybesthub.com/# payday loans online instant approval
https://generixpharm.shop/lasix-furosemide-protocols/# GenerixPharm
http://paydaybesthub.com/# most reputable payday loans
payday loans direct lenders: get a cash advance immediately – payday loans online same day
http://paydaybesthub.com/# loans online instant approval with no credit
http://paydaybesthub.com/# payday loans online
payday loans no interest: most reputable payday loan companies – instant cash advance no fee
https://paydaybesthub.online/# best and quickest payday loans
https://paydaybesthub.online/# reputable payday loan lenders
Viagra genérica sin receta: Viagra genérico precio – UCI Pediatría Toledo
http://lacefieldurology.com/# where can i buy erectile dysfunction pills
https://ucipediatriatoledo.shop/# Viagra precio sin receta
UCI Pediatría [url=http://ucipediatriatoledo.com/#]Comprar Viagra en España[/url] Comprar Viagra online seguro
Comprar Viagra online seguro: Comprar Viagra en España – viagra
https://pediatraefrainvillalobos.com/# Efrain Villalobos Verduzco
https://lacefieldurology.com/# ed meds by mail
Efrain Villalobos Verduzco: farmacia online barata – farmacia online
http://lacefieldurology.com/# online ed pharmacy
https://ucipediatriatoledo.com/# Comprar Viagra online seguro
Viagra genérico precio [url=https://ucipediatriatoledo.com/#]viagra[/url] UCI Pediatría Toledo
farmacia online: farmacia online – Farmacia online envío gratis
https://pediatraefrainvillalobos.com/# Efrain Villalobos Verduzco
https://lacefieldurology.shop/# best online ed medication
Comprar Viagra: Viagra genérico precio – viagra
http://pediatraefrainvillalobos.com/# farmacia barata
https://ucipediatriatoledo.com/# Comprar Viagra original online
viagra [url=https://ucipediatriatoledo.com/#]Viagra genérico precio[/url] Viagra precio sin receta
https://ucipediatriatoledo.shop/# Viagra precio sin receta
best ed medication online: Lacefield – no rx needed pharmacy
https://lacefieldurology.shop/# where can i buy ed pills
http://lacefieldurology.com/# cheap ed treatment
cheapest ed pills: Lacefield – buy drugs online
Viagra precio sin receta [url=http://ucipediatriatoledo.com/#]UCI Pediatría[/url] UCI Pediatría
http://pediatraefrainvillalobos.com/# farmacia online barata
https://pediatraefrainvillalobos.com/# Farmacias baratas online envío gratis
Farmacia online envío gratis: Farmacia online envío gratis – farmacia barata
http://lacefieldurology.com/# buy erectile dysfunction treatment
http://ucipediatriatoledo.com/# Comprar Viagra en España
farmacia online: farmacia barata – farmacia barata
https://ucipediatriatoledo.com/# Comprar Viagra original online
where to buy ed pills [url=https://lacefieldurology.com/#]Lacefield[/url] pharmacy no prescription required
farmacia barata: Efrain Villalobos Verduzco – Pediatra Efrain Villalobos
https://ucipediatriatoledo.com/# Comprar Viagra en farmacia sin receta
Pediatra Efrain Villalobos: farmacia online – Farmacias baratas online envío gratis
http://lacefieldurology.com/# ed meds by mail
https://pediatraefrainvillalobos.shop/# farmacia online barata
Pediatra Efrain Villalobos: Efrain Villalobos Verduzco – Farmacia online envío gratis
http://pediatraefrainvillalobos.com/# Pediatra Efrain Villalobos
erectile dysfunction meds online [url=http://lacefieldurology.com/#]Dr Lacefield[/url] online pharmacy without prescription
http://lacefieldurology.com/# buying ed pills online
http://lacefieldurology.com/# buy erectile dysfunction medication
Efrain Villalobos Verduzco: farmacia online – Farmacia online España
http://lacefieldurology.com/# ed rx online
https://pediatraefrainvillalobos.shop/# Pediatra Efrain Villalobos
UCI Pediatría: Comprar Viagra en España – Viagra genérica sin receta
http://pediatraefrainvillalobos.com/# farmacia barata
http://ucipediatriatoledo.com/# Comprar Viagra
viagra [url=https://ucipediatriatoledo.shop/#]Viagra precio sin receta[/url] Comprar Viagra en farmacia sin receta
Viagra precio sin receta: Comprar Viagra original online – Comprar Viagra en farmacia sin receta
http://pediatraefrainvillalobos.com/# farmacia barata
buy ed pills: Lacefield Urology – secure medical online pharmacy
https://lacefieldurology.shop/# low cost ed meds online
https://ucipediatriatoledo.com/# Viagra genérico precio
farmacia barata: Farmacias baratas online envío gratis – farmacia online
https://lacefieldurology.com/# low cost ed meds online
https://ucipediatriatoledo.com/# viagra
Comprar Viagra original online [url=https://ucipediatriatoledo.com/#]Comprar Viagra en farmacia sin receta[/url] viagra
Viagra 100 mg sans ordonnance: Viagra femme sans ordonnance 24h – Prix du Viagra 100mg en France
https://vgrfrancepharm.online/# Viagra femme sans ordonnance 24h
https://vgrfrancepharm.online/# Prix du Viagra 100mg en France
https://mexicanfastdelivery.top/# best mexican pharmacy
farmacia mexicana en linea: pharmacy mexico – mexico online farmacia
https://vgrfrancepharm.online/# Viagra femme ou trouver
https://mexicomedsrx.online/# mexican pharmacy prices
https://sildenafilsansordonnance.online/# SildГ©nafil 100 mg sans ordonnance
Viagra vente libre pays: Viagra vente libre pays – SildГ©nafil Teva 100 mg acheter
https://sildenafilsansordonnance.online/# Viagra sans ordonnance livraison 48h
https://mexicanusarx.online/# mexipharmacy reviews
mexico online farmacia: good online mexican pharmacy – farmacia mexicana en chicago
https://mexicanusarx.online/# п»їmexican pharmacy
https://vgrfrancepharm.online/# Meilleur Viagra sans ordonnance 24h
mexico prescription online: tijuana pharmacy online – order antibiotics from mexico
https://vgrfrancepharm.online/# п»їViagra sans ordonnance 24h
https://mexicanusarx.online/# pharma mexicana
https://mexicanfastdelivery.top/# farmacia pharmacy mexico purchase online
Viagra 100 mg sans ordonnance: Quand une femme prend du Viagra homme – Viagra pas cher inde
https://vgrfrancepharm.online/# Le gГ©nГ©rique de Viagra
https://sildenafilsansordonnance.online/# Prix du Viagra 100mg en France
https://mexicanusarx.online/# mexico medicine
reliable rx pharmacy: purple pharmacy mexico – online drugs order
https://vgrfrancepharm.online/# SildГ©nafil Teva 100 mg acheter
https://mexicomedsrx.online/# mexico prescriptions
https://vgrfrancepharm.online/# Viagra homme prix en pharmacie sans ordonnance
Viagra homme prix en pharmacie sans ordonnance: Quand une femme prend du Viagra homme – Acheter Sildenafil 100mg sans ordonnance
https://vgrfrancepharm.online/# Sildenafil teva 100 mg sans ordonnance
http://clinicalpathiver.com/# ivermectin uk
ClinicalPathIver: ClinicalPathIver – stromectol ireland
stromectol ivermectin tablets [url=https://clinicalpathiver.com/#]ClinicalPathIver[/url] buy ivermectin
http://cyclecareclomid.com/# where buy cheap clomid no prescription
CycleCareClomid: where can i get generic clomid – CycleCareClomid
how can i get generic clomid online: CycleCareClomid – generic clomid without rx
farmacie online sicure [url=https://farmaciacaman.online/#]FarmaciaCaman[/url] buy online medicine
https://farmaciacaman.com/# п»їFarmacia online migliore
ClinicalPathIver: ClinicalPathIver – stromectol 6 mg tablet
http://farmaciacaman.com/# top farmacia online
п»їFarmacia online migliore [url=https://farmaciacaman.com/#]FarmaciaCaman[/url] trusted online pharmacy
ivermectin generic: ClinicalPathIver – ClinicalPathIver
order clomid without a prescription: buying generic clomid without dr prescription – CycleCareClomid
https://clinicalpathiver.shop/# ClinicalPathIver
where to buy generic clomid [url=https://cyclecareclomid.shop/#]CycleCareClomid[/url] how to get clomid for sale
http://clinicalpathiver.com/# price of ivermectin
ClinicalPathIver: ClinicalPathIver – ClinicalPathIver
migliori farmacie online 2024 [url=https://farmaciacaman.online/#]farmacie online affidabili[/url] legal online pharmacy
http://cyclecareclomid.com/# CycleCareClomid
where can i get generic clomid without a prescription: CycleCareClomid – CycleCareClomid
cost of generic clomid pills: CycleCareClomid – CycleCareClomid
where to buy clomid tablets [url=https://cyclecareclomid.shop/#]where to get clomid prices[/url] buy generic clomid pill
https://farmaciacaman.online/# farmacia online piГ№ conveniente
CycleCareClomid: CycleCareClomid – where to get clomid
https://cyclecareclomid.com/# get clomid tablets
Farmacia online piГ№ conveniente [url=http://farmaciacaman.com/#]FarmaciaCaman[/url] no rx needed pharmacy
CycleCareClomid: cost of generic clomid without prescription – CycleCareClomid
farmaci senza ricetta elenco: FarmaciaCaman – trusted online pharmacy
https://farmaciacaman.com/# migliori farmacie online 2024
comprare farmaci online con ricetta [url=https://farmaciacaman.com/#]top farmacia online[/url] no rx needed pharmacy
ClinicalPathIver: ClinicalPathIver – ClinicalPathIver
https://farmaciacaman.online/# farmacie online autorizzate elenco
farmacia online senza ricetta [url=https://farmaciacaman.online/#]FarmaciaCaman[/url] online pharmacy
Farmacia online piГ№ conveniente: Farmacia online miglior prezzo – trusted online pharmacy
https://cyclecareclomid.com/# where can i buy generic clomid pill
farmacie online sicure [url=https://farmaciacaman.online/#]acquisto farmaci con ricetta[/url] top online pharmacy
Farmacie online sicure: FarmaciaCaman – legit online pharmacy
https://cyclecareclomid.com/# CycleCareClomid
oral ivermectin cost [url=https://clinicalpathiver.shop/#]ivermectin cream[/url] ClinicalPathIver
migliori farmacie online 2024: farmacie online sicure – top-rated online pharmacies
https://farmaciacaman.online/# comprare farmaci online all’estero
Your article helped me a lot, is there any more related content? Thanks!
ClinicalPathIver: ivermectin topical – buy ivermectin uk
https://cyclecareclomid.com/# where to get clomid no prescription
stromectol order online [url=https://clinicalpathiver.com/#]ClinicalPathIver[/url] ivermectin 3mg tablets price
buy ivermectin canada: ivermectin oral 0 8 – ivermectin 1 cream generic
http://cyclecareclomid.com/# CycleCareClomid
affordable pharmacy: my mexican pharmacy – farmacias online usa
https://doctortopfrance.icu/# Viagra 100 mg sans ordonnance
https://vgrsansordonnance.online# Viagra vente libre pays
order meds from mexico: mexican medicine – my mexican pharmacy
https://vgrsansordonnance.online# Meilleur Viagra sans ordonnance 24h
Le gГ©nГ©rique de Viagra: Viagra gГ©nГ©rique pas cher livraison rapide – Prix du Viagra en pharmacie en France
https://mexicandoctorate.top/# order meds from mexico
Viagra homme prix en pharmacie sans ordonnance [url=https://doctortopfrance.icu/#]Viagra homme prix en pharmacie[/url] Prix du Viagra 100mg en France
https://mexicandoctortous.online/# mexico farmacia
online pharmacy: pharmacy mexico – п»їmexican pharmacy
https://mexicandoctortous.online/# mexican pharmacies online
mexican drugstore: best mexican online pharmacy – mexican pharmacy that ships to the us
https://mexicandoctorate.top/# order meds from mexico
Viagra sans ordonnance livraison 24h [url=https://vgrsansordonnance.top/#]Viagra sans ordonnance livraison 48h[/url] Viagra homme prix en pharmacie sans ordonnance
https://vgrsansordonnance.top/# Viagra vente libre allemagne
https://mexicandoctortous.online/# online pharmacies
mexico pharmacy order online: mexican pharmacy that ships to the us – order medicine from mexico
https://mexicotoppharmacy.icu/# affordable pharmacy
mexicanrxpharm: farmacia pharmacy mexico purchase online – order medicine from mexico
https://mexicandoctorate.top/# mexico drug store online
https://vgrsansordonnance.online# Viagra pas cher livraison rapide france
SildГ©nafil 100 mg prix en pharmacie en France [url=https://vgrsansordonnance.top/#]Viagra vente libre allemagne[/url] Viagra prix pharmacie paris
hydrocodone mexico pharmacy: mexico city pharmacy – medications can i buy mexico
https://mexicandoctorate.top/# mexican pharmacys
mexico meds: pharmacies in mexico – best online mexican pharmacy
https://vgrsansordonnance.top/# Viagra vente libre pays
https://mexicandoctortous.online/# mexico medication
pharmacy mexico online: mexican drugstore – pharmacy online
https://vgrsansordonnance.online# Viagra homme sans prescription
Viagra 100 mg sans ordonnance [url=https://doctortopfrance.icu/#]Quand une femme prend du Viagra homme[/url] Sildenafil teva 100 mg sans ordonnance
https://mexicotoppharmacy.icu/# pharmacy mexico city
Viagra femme ou trouver: Viagra homme prix en pharmacie sans ordonnance – Viagra sans ordonnance pharmacie France
https://doctortopfrance.icu/# Viagra en france livraison rapide
https://vgrsansordonnance.online# Viagra vente libre pays
Viagra pas cher paris: Viagra pas cher livraison rapide france – Viagra 100 mg sans ordonnance
https://doctortopfrance.icu/# Viagra femme sans ordonnance 24h
mail order pharmacies: best mexican online pharmacy – pharmacia mexico
https://mexicotoppharmacy.icu/# mexicanrxpharm
https://mexicandoctorate.top/# mexican pharmacies online
https://mexicandoctortous.online/# purple pharmacy mexico
SildГ©nafil 100 mg prix en pharmacie en France: Viagra gГ©nГ©rique sans ordonnance en pharmacie – Prix du Viagra 100mg en France
Viagra sans ordonnance 24h Amazon [url=https://vgrsansordonnance.online#]Viagra homme prix en pharmacie sans ordonnance[/url] Viagra homme prix en pharmacie sans ordonnance
https://mexicotoppharmacy.icu/# pharmacies in mexico that ship to the us
Viagra sans ordonnance 24h Amazon: Prix du Viagra 100mg en France – Viagra homme prix en pharmacie
https://doctortopfrance.icu/# Sildenafil teva 100 mg sans ordonnance
https://vgrsansordonnance.top/# Viagra prix pharmacie paris
mexican online pharmacy wegovy: prescriptions from mexico – pharmacy in mexico that ships to us
https://doctortopfrance.icu/# SildГ©nafil 100 mg prix en pharmacie en France
medicine mexico [url=https://mexicotoppharmacy.icu/#]prescriptions from mexico[/url] purple pharmacy mexico
Viagra sans ordonnance 24h suisse: Viagra homme sans prescription – SildГ©nafil Teva 100 mg acheter
https://doctortopfrance.icu/# Viagra sans ordonnance livraison 24h
https://vgrsansordonnance.online# Viagra sans ordonnance 24h
Meilleur Viagra sans ordonnance 24h: Viagra gГ©nГ©rique sans ordonnance en pharmacie – Meilleur Viagra sans ordonnance 24h
https://vgrsansordonnance.top/# Quand une femme prend du Viagra homme
https://vgrsansordonnance.online# Sildenafil teva 100 mg sans ordonnance
Viagra sans ordonnance livraison 48h: Meilleur Viagra sans ordonnance 24h – Meilleur Viagra sans ordonnance 24h
buying prescriptions in mexico [url=https://mexicotoppharmacy.icu/#]tijuana pharmacy online[/url] the purple pharmacy mexico
https://vgrsansordonnance.online# Viagra pas cher inde
mexican drug store: best mexican pharmacy online – mexican pharmacies
https://vgrsansordonnance.online# Viagra homme prix en pharmacie sans ordonnance
Viagra 100mg prix: Quand une femme prend du Viagra homme – SildГ©nafil Teva 100 mg acheter
mexican pharmacies online [url=https://mexicotoppharmacy.icu/#]pharmacy in mexico online[/url] reputable mexican pharmacy
https://vgrsansordonnance.online# SildГ©nafil Teva 100 mg acheter
mexico pet pharmacy: online pharmacy mexico – order medication from mexico
https://mexicandoctortous.online/# purple pharmacy
mexico drug store: mexican pharma – mexico meds
https://mexicotoppharmacy.icu/# pharmacy in mexico that ships to us
https://mexicotoppharmacy.icu/# pharmacy mexico
farmacia mexicana online: mexican rx – mexico pharmacy list
https://vgrsansordonnance.top/# Viagra homme prix en pharmacie sans ordonnance
farmacias online usa: Mexican Pills – pharmacy order online
https://indiapharmdelivery.com/# India Pharm Delivery
https://mexicanpills.com/# mexican pharmacy near me
best online mexican pharmacy: best mexican pharmacy online – worldwide pharmacy
India Pharm Delivery [url=https://indiapharmdelivery.com/#]world pharmacy india[/url] reputable indian pharmacies
https://indiapharmdelivery.shop/# best online pharmacy india
https://mexicanpills.shop/# farmacia mexicana en linea
best online mexican pharmacy: Mexican Pills – best online pharmacy no prescription
http://indiapharmdelivery.com/# indianpharmacy com
http://canadapillsdelivery.com/# Canada Pills Delivery
India Pharm Delivery: reputable indian pharmacies – India Pharm Delivery
buying prescription drugs in mexico [url=https://mexicanpills.com/#]Mexican Pills[/url] reliable online pharmacy
https://mexicanpills.com/# pharmacy mexico city
http://indiapharmdelivery.com/# India Pharm Delivery
https://mexicanpills.com/# mexican meds
is mexipharmacy legit: reliable rx pharmacy – no script pharmacy
https://canadapillsdelivery.com/# Canada Pills Delivery
http://canadapillsdelivery.com/# Canada Pills Delivery
online pharmacy india: India Pharm Delivery – India Pharm Delivery
http://indiapharmdelivery.com/# India Pharm Delivery
pharmacys in mexico: mexican farmacia – online drugs order
https://mexicanpills.com/# online pharmacy mexico
https://canadapillsdelivery.shop/# best price rx pharmacy canada
canada pharmacy store [url=https://canadapillsdelivery.com/#]Canada Pills Delivery[/url] Canada Pills Delivery
indianpharmacy com: India Pharm Delivery – india pharmacy mail order
https://canadapillsdelivery.com/# ed meds online canada
best pharmacy in mexico: mexico medicine – legit online pharmacy
https://indiapharmdelivery.shop/# indian pharmacy paypal
https://indiapharmdelivery.com/# India Pharm Delivery
ed meds online canada: legitimate canadian online pharmacies – Canada Pills Delivery
legitimate canadian pharmacy online: Canada Pills Delivery – Canada Pills Delivery
http://indiapharmdelivery.com/# India Pharm Delivery
India Pharm Delivery [url=https://indiapharmdelivery.com/#]pharmacy website india[/url] India Pharm Delivery
http://indiapharmdelivery.com/# indianpharmacy com
legal to buy prescription drugs from canada: Canada Pills Delivery – Canada Pills Delivery
http://mexicanpills.com/# mexican medicine
https://mexicanpills.shop/# mexican pharmacy online
India Pharm Delivery: top 10 online pharmacy in india – indian pharmacies safe
https://indiapharmdelivery.com/# top online pharmacy india
india pharmacy mail order: online shopping pharmacy india – India Pharm Delivery
canadian pharmacy world reviews [url=https://canadapillsdelivery.shop/#]Canada Pills Delivery[/url] Canada Pills Delivery
https://mexicanpills.com/# mexican rx
worldwide pharmacy: farmacia mexicana online – online pharmacy
https://canadapillsdelivery.com/# Canada Pills Delivery
https://mexicanpills.shop/# mexico prescription online
buy canadian drugs: Canada Pills Delivery – Canada Pills Delivery
https://mexicanpills.com/# mexico pet pharmacy
http://indiapharmdelivery.com/# India Pharm Delivery
online pharmacy in mexico: best mexican pharmacy – medstore online pharmacy
my mexican pharmacy [url=https://mexicanpills.com/#]Mexican Pills[/url] medstore online pharmacy
Canada Pills Delivery: canadianpharmacy com – cross border pharmacy canada
https://mexicanpills.com/# buying prescriptions in mexico
https://indiapharmdelivery.com/# India Pharm Delivery
http://mexicanpills.com/# medicine mexico
mexican pharmacy near me: Mexican Pills – best mail order pharmacy
https://mexicanpills.shop/# mexican pharmacy near me
world pharmacy india: indian pharmacies safe – India Pharm Delivery
mexican online mail order pharmacy [url=http://mexicanpills.com/#]Mexican Pills[/url] trusted online pharmacy
https://indiapharmdelivery.shop/# online pharmacy india
La lecture de [url=https://commanderdestraitements.online/#]Г©tudes cliniques hospitaliГЁres[/url] vous aidera faire le bon choix.
After a lot of research, I found that [url=https://retaildiscountprograms.online/#]click here for details[/url] remains the top option.
Les rГЁgles de santГ© sont respectГ©es par [url=п»їhttps://santemasculine.top/#]directives dГ©ontologiques officielles[/url].
Quit wasting money and begin ordering from https://mexicanrxnews.top/# instead.
Don’t hesitate to check out the details at [url=https://retaildiscountprograms.online/#]international prescription fulfillment[/url] for additional savings.
Fuyez les pharmacies physiques en choisissant les donnГ©es de l’hГґpital.
Profitez des meilleurs prix via https://commanderdestraitements.online/#.
Consultez toute la gamme mises en avant sur https://commanderdestraitements.online/#.
We always direct people to [url=п»їhttps://nathealth.casa/#]companies that ship internationally[/url] for questions regarding affordable health supplies.
You might want to checking out [url=п»їhttps://nathealth.casa/#]the provider’s website[/url] to understand how the delivery is handled.
N’hГ©sitez plus et dГ©couvrez Conseil National de l’Ordre des MГ©decins maintenant.
The team at https://retaildiscountprograms.online/# is known to be excellent.
Simply click US-based digital platforms to begin the catalog.
La vie privée est respectée via réglementation médicale actuelle.
Acheter un gГ©nГ©rique de qualitГ© est facile via п»їhttps://santemasculine.top/#.
Visit [url=https://retaildiscountprograms.online/#]MME logistics[/url] to find out additional details.
According to customer feedback, [url=п»їhttps://nathealth.casa/#]FDA regulatory framework[/url] is a highly recommended service for international shipping.
L’analyse de recherches sur les dysfonctions Г©rectiles vous aidera mieux comprendre.
Les Г©tapes sont dГ©taillГ©es sur donnГ©es des centres hospitaliers universitaires.
La vie privГ©e est conservГ©e sur le site [url=https://commanderdestraitements.online/#]Г©tudes acadГ©miques[/url].
A fantastic tool for this method can be found at official sanitary commission guidelines.
Fuyez les dГ©placements en choisissant rapports de recherche clinique.
Selon les retours clients, lire le rapport officiel garantit une excellente prestation.
Just click [url=п»їhttps://nathealth.casa/#]read the full documentation here[/url] to start the catalog.
En cas de besoin urgent, [url=https://servicesdepharmacie.icu/#]boutique SantГ© Homme[/url] reste une option trГЁs pratique.
Un assortiment complet vous est proposГ© sur [url=п»їhttps://santemasculine.top/#]alternative gГ©nГ©rique approuvГ©e[/url].
L’accГЁs sur internet devient plus simple grГўce Г le site du Conseil de l’Ordre.
We advise you to save https://retaildiscountprograms.online/# for future reference.
I have been relying on п»їhttps://nathealth.casa/# for years and the service is consistently top-notch.
As stated previously, using [url=https://mexicanrxnews.top/#]federal import policies[/url] offers huge savings.
Pour une meilleure qualitГ© de vie, [url=https://commanderdestraitements.online/#]Г©tudes cliniques hospitaliГЁres[/url] donne des informations clГ©s.
N’oubliez pas que [url=п»їhttps://santemasculine.top/#]commander des traitements en ligne en toute sГ©curitГ©[/url] propose des rГ©ponses claires.
Shoppers now prefer to order from US-based digital platforms for saving money on daily medications.
La commande sur internet est simplifiГ© quand on utilise [url=https://commanderdestraitements.online/#]recommandations sur la dispensation des soins[/url].
Le bien-ГЄtre des hommes exige des traitements sГ»rs, comme expliquГ© sur [url=п»їhttps://santemasculine.top/#]avis des spГ©cialistes parisiens[/url].
Using check current pricing, the shipping process is totally smooth.
Les rГЁgles de qualitГ© sont suivies par п»їhttps://santemasculine.top/#.
There are many positive reviews regarding the MexiMedsExpress platform on the web.
Les rГЁgles pharmaceutiques sont appliquГ©es par AP-HP.
Il n’a jamais Г©tГ© aussi facile de se procurer ce qu’il faut via [url=https://servicesdepharmacie.icu/#]rГ©seau hospitalier AP-HP[/url].
Recevez vos produits facilement en utilisant https://commanderdestraitements.online/#.
Il est parfois prГ©fГ©rable de consulter les retours sur [url=https://servicesdepharmacie.icu/#]la plateforme SantГ© Homme France[/url] avant tout achat.
Retrouvez les différentes options proposées sur https://servicesdepharmacie.icu/#.
Various reviewers point to [url=https://mexicanrxnews.top/#]FDA regulatory framework[/url] as a safe way to buy.
Trouvez vos produits en toute discrГ©tion en utilisant avis des instances mГ©dicales.
If you want bypass high markups, give a try to https://retaildiscountprograms.online/#.
Pour tout achat rapide, [url=п»їhttps://santemasculine.top/#]la plateforme SantГ© Homme France[/url] est une alternative trГЁs pratique.
La vie privГ©e est une prioritГ© via cette boutique spГ©cialisГ©e.
La transparence des offres proposГ©e par https://commanderdestraitements.online/# est un gage de confiance.
Plusieurs hommes conseillent le recours Г [url=п»їhttps://santemasculine.top/#]solutions discrГЁtes pour les hommes[/url] pour s’informer.
You might consider checking out [url=https://retaildiscountprograms.online/#]explore their catalog[/url] to understand how the process works.
Just click [url=https://mexicanrxnews.top/#]US-based digital platforms[/url] and see the catalog.
We were amazed by the affordability provided by FDA regulatory framework.
Stop spending a fortune and start using cross-border delivery options right away.
En matiГЁre de traitements intimes, https://servicesdepharmacie.icu/# reste une rГ©fГ©rence.
Une interface sГ©curisГ©(e) tel que [url=п»їhttps://santemasculine.top/#]avis des spГ©cialistes parisiens[/url] facilite la vie.
п»їAfin de dГ©couvrir plus d’informations, n’hГ©sitez pas Г visiter boutique SantГ© Homme.
Il est parfois conseillГ© de vГ©rifier les avis sur donnГ©es des centres hospitaliers universitaires avant tout achat.
D’aprГЁs les derniers avis, https://commanderdestraitements.online/# garantit une excellente prestation.
A friend of mine suggested [url=https://retaildiscountprograms.online/#]click here for details[/url], and I am glad they did.